

David Dubbeldam
Rocks is an open-source Linux cluster distribution that enables end users to easily build computational clusters. Rocks can be run under virtualization for testing purposes. Here the setup for rocks 7.0 under VMware Fusion 12 will be explained.
Rocks configures the network of the frontend using dhcp or a static ip address. But the frontend functions as a server to all the compute nodes and runs it own dhcp server on an internal network. In this internal network the IP address of the frontend is 10.1.1.1. The first few compute nodes are:
The first number after the compute is the rack, the second number is the rank. The rack and rank allows you define groups of compute nodes for example based on the rack in which they reside, or based on being of a similar hardware type. If less than 255 computes node are used, all nodes can be address with a subnet-mask of 255.255.255.0. This more than sufficient for the purpose of testing and playing around with rocks in a virtual machine. In order for the virtual machine to make use of an internal network, we need to create a virtual network interface on the Mac side.
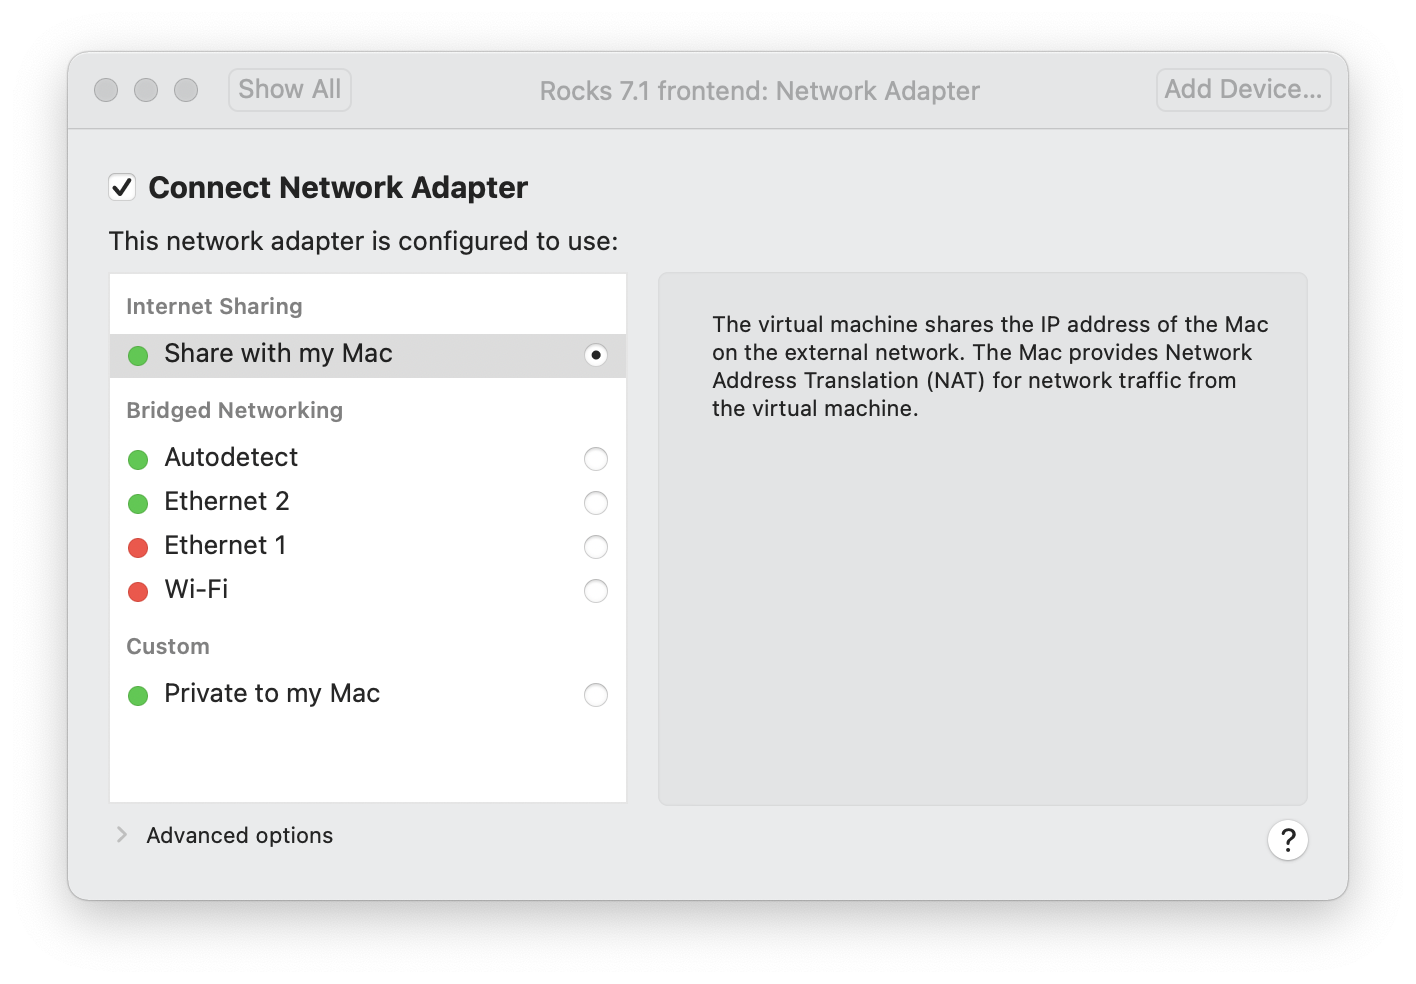
VMWare makes use of the network card that is active on the Mac side, using NAT (Network Address Translation).
On the Mac side
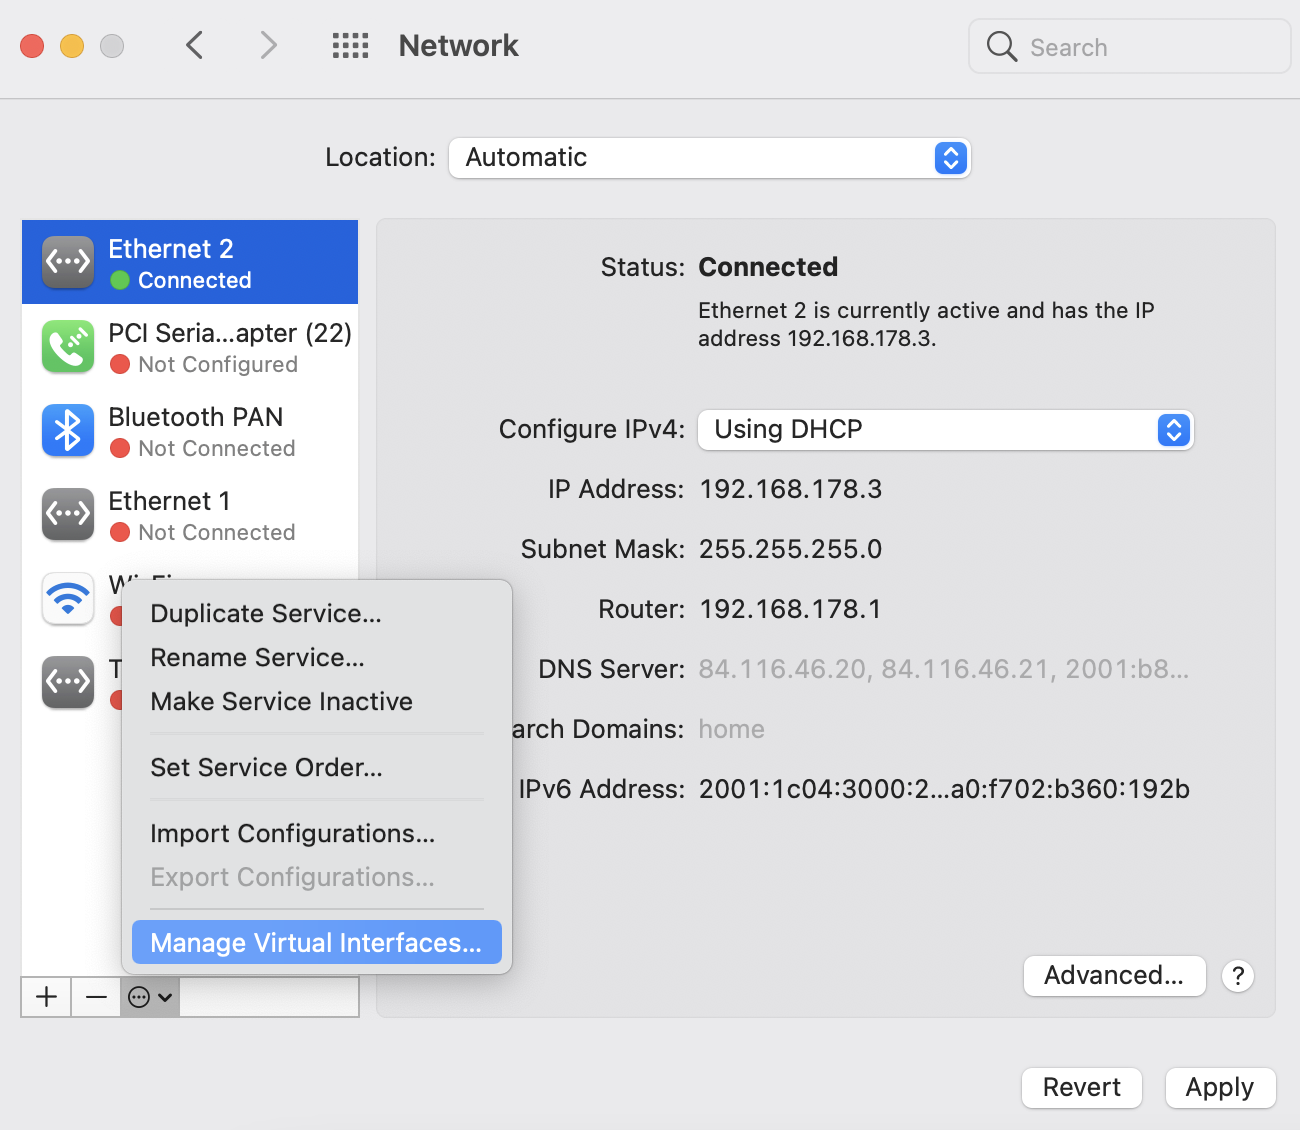
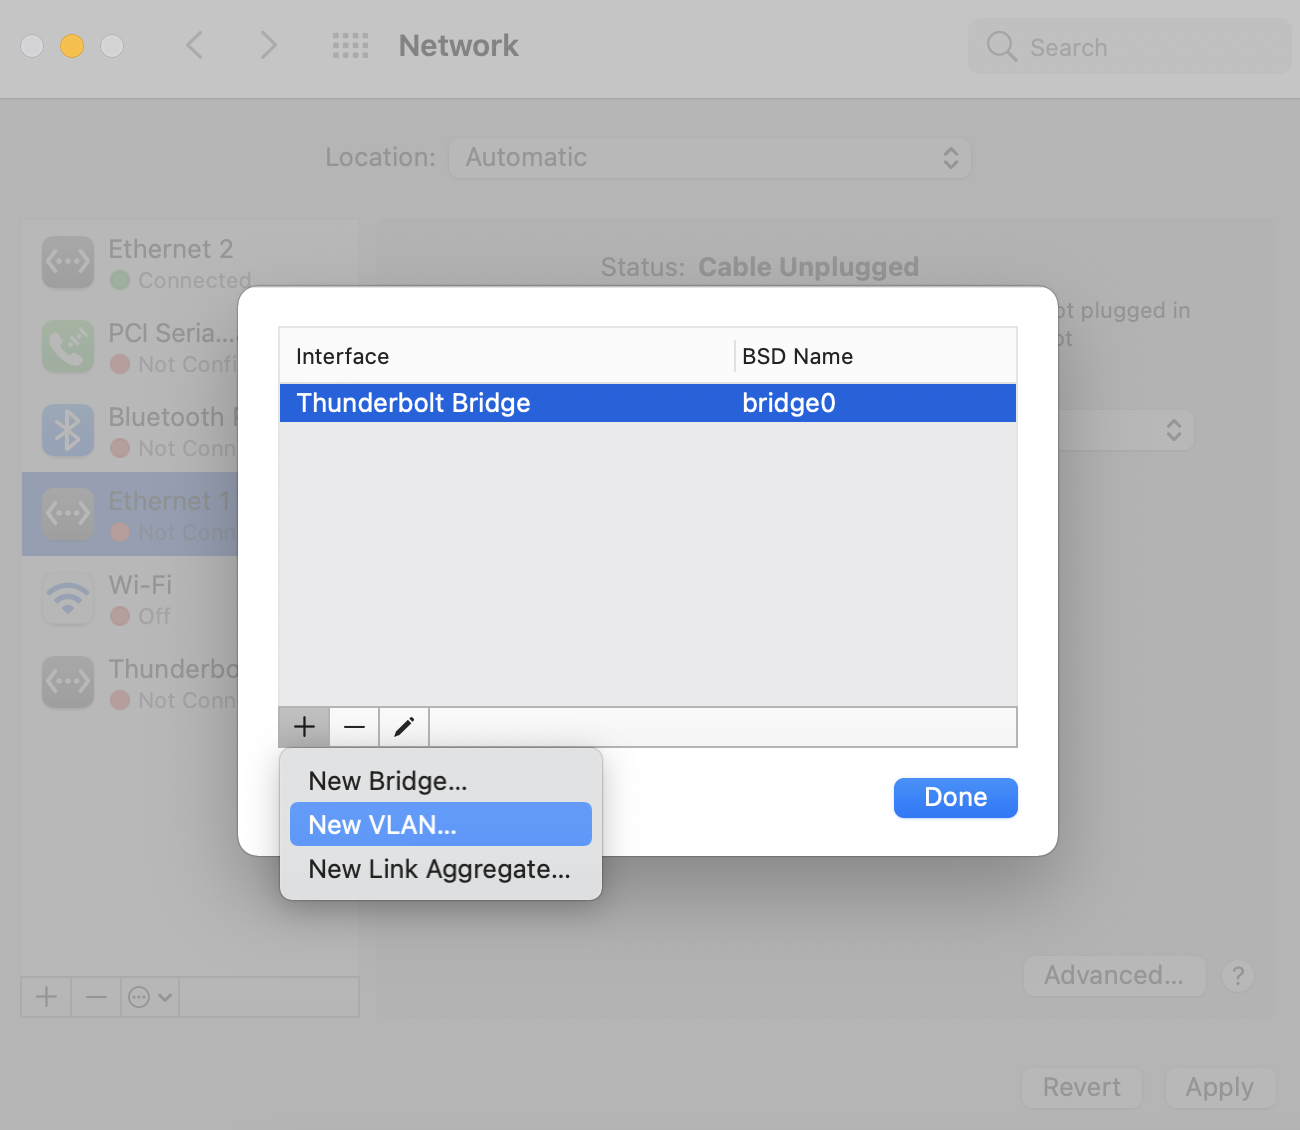
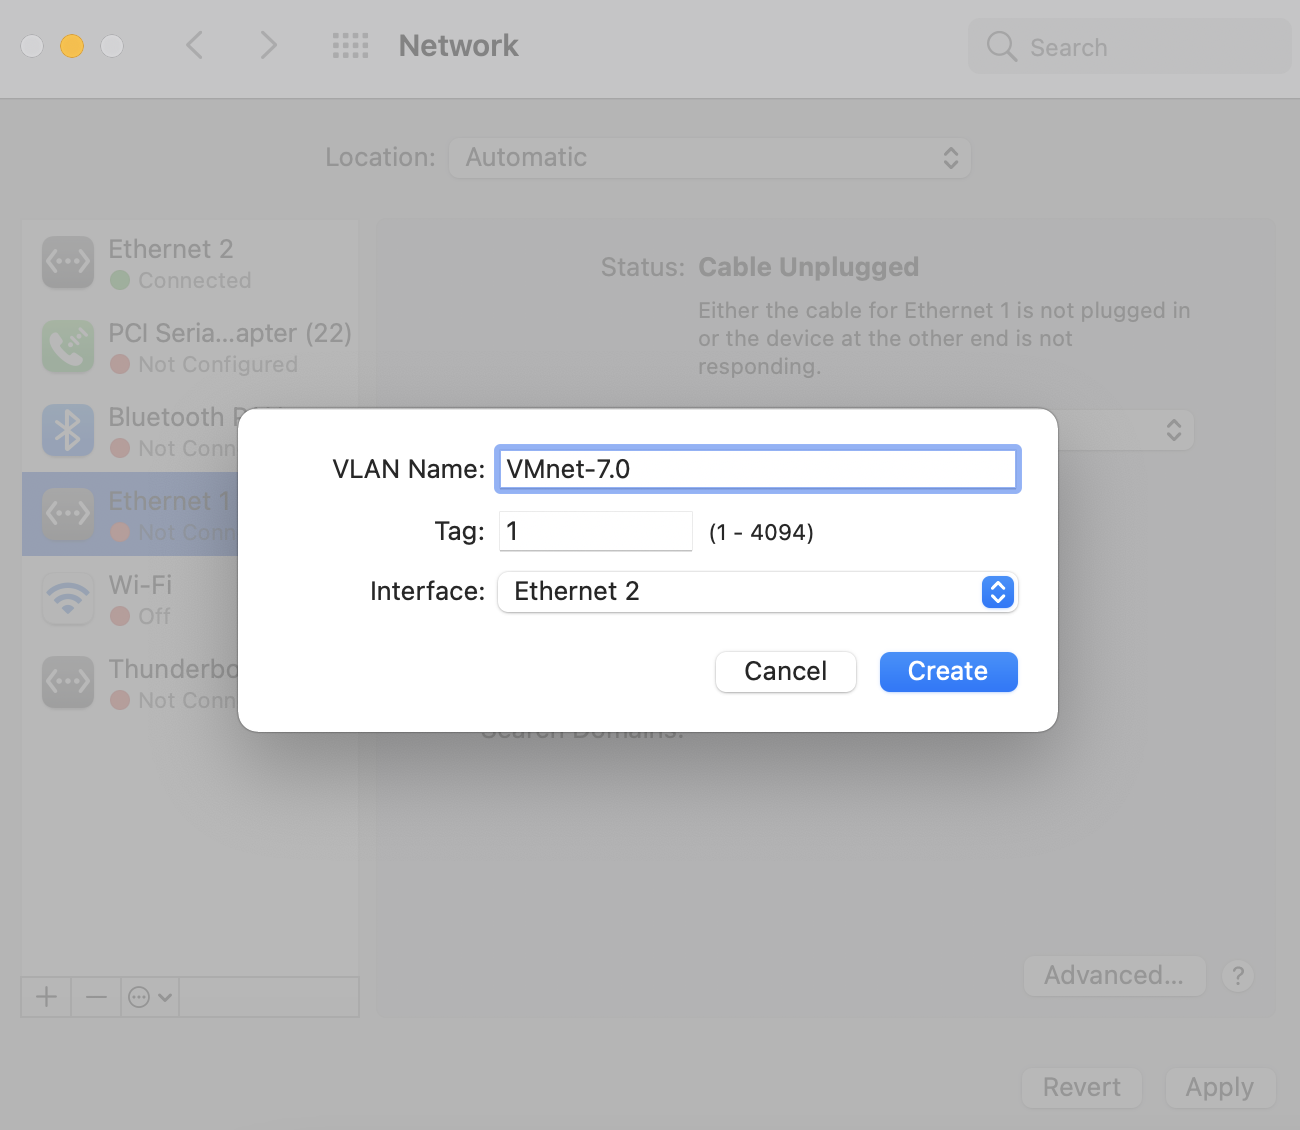
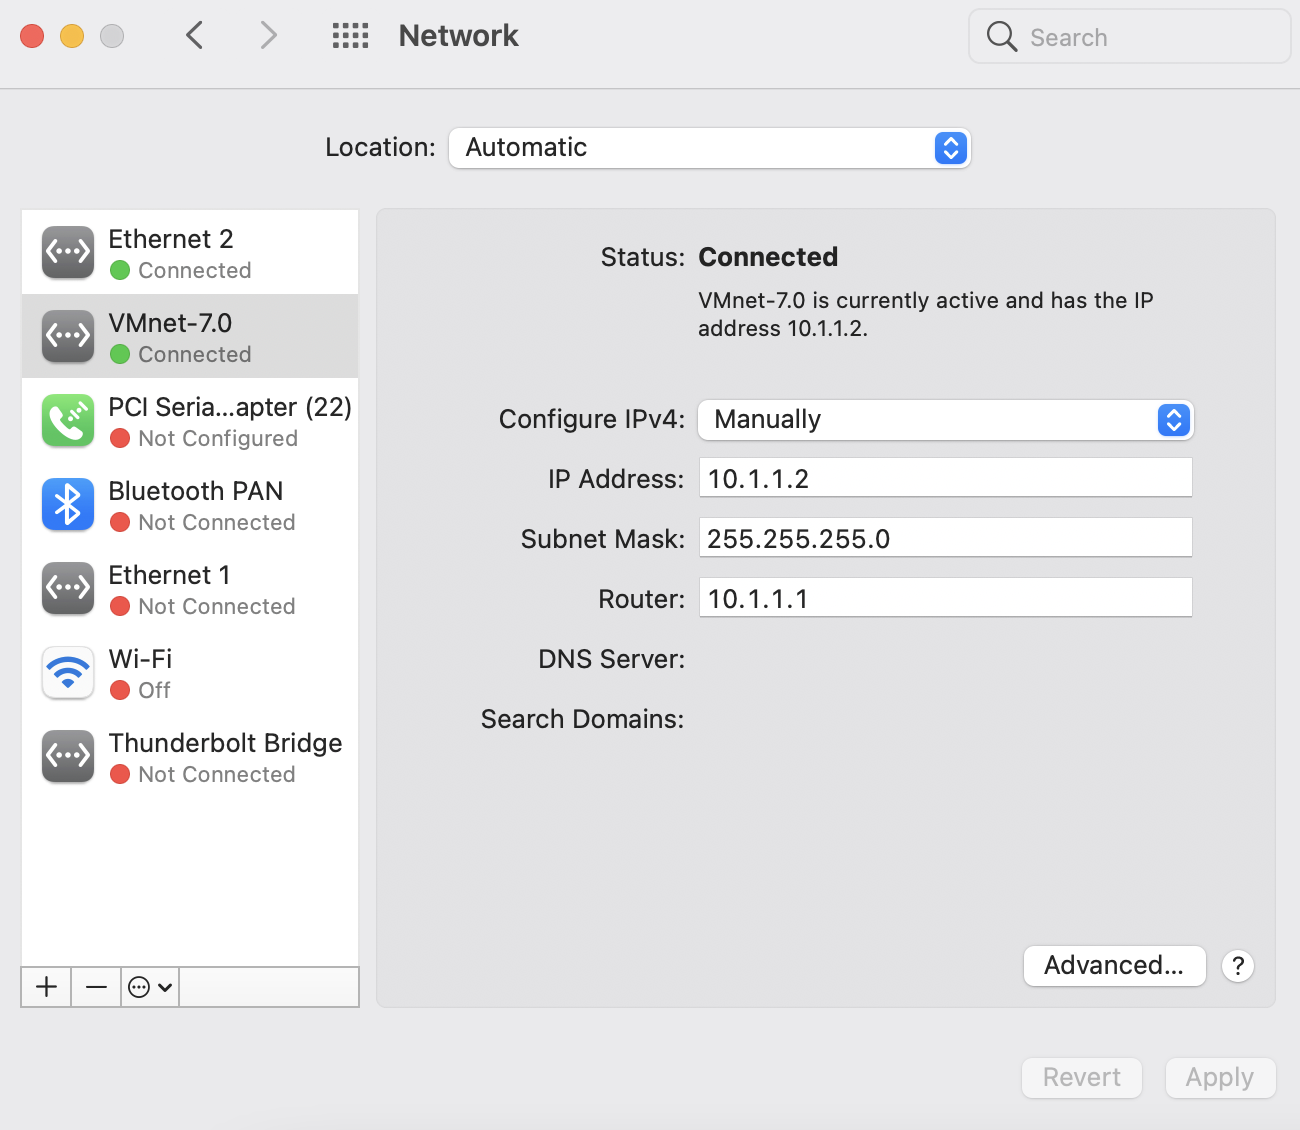
The first step is create a virtual network interface. This can be done from “System Preferences” and “Network”. Click on the “Manage Virtual Interfaces”. Step 2 is to select “New VLAN” and then change a representative name (here “VMnet-7.0”). Note that the interface will be the active Ethernet 2. The last step is configure the virtual net. Select a manual IP address of 10.1.1.2, which will be the address of the Mac in the internal rocks network (10.1.1.1 will be used by the rocks frontend). In particular, the subnet mask and router are important. After pressing “Apply” the virtual network becomes active.
On the VMWare side: the frontend
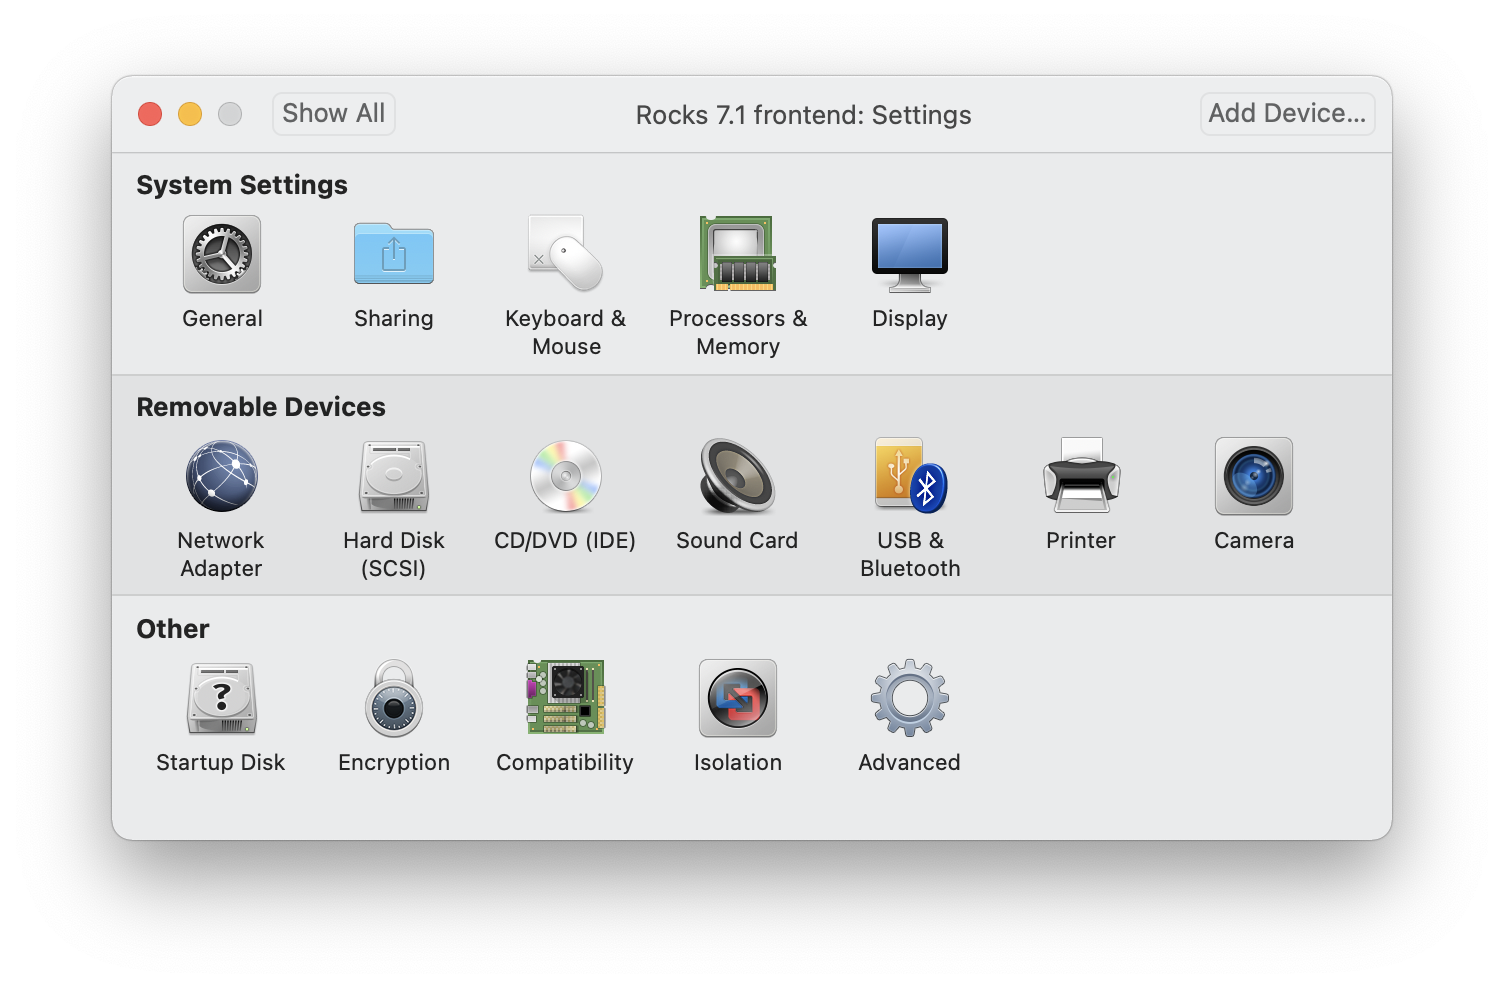
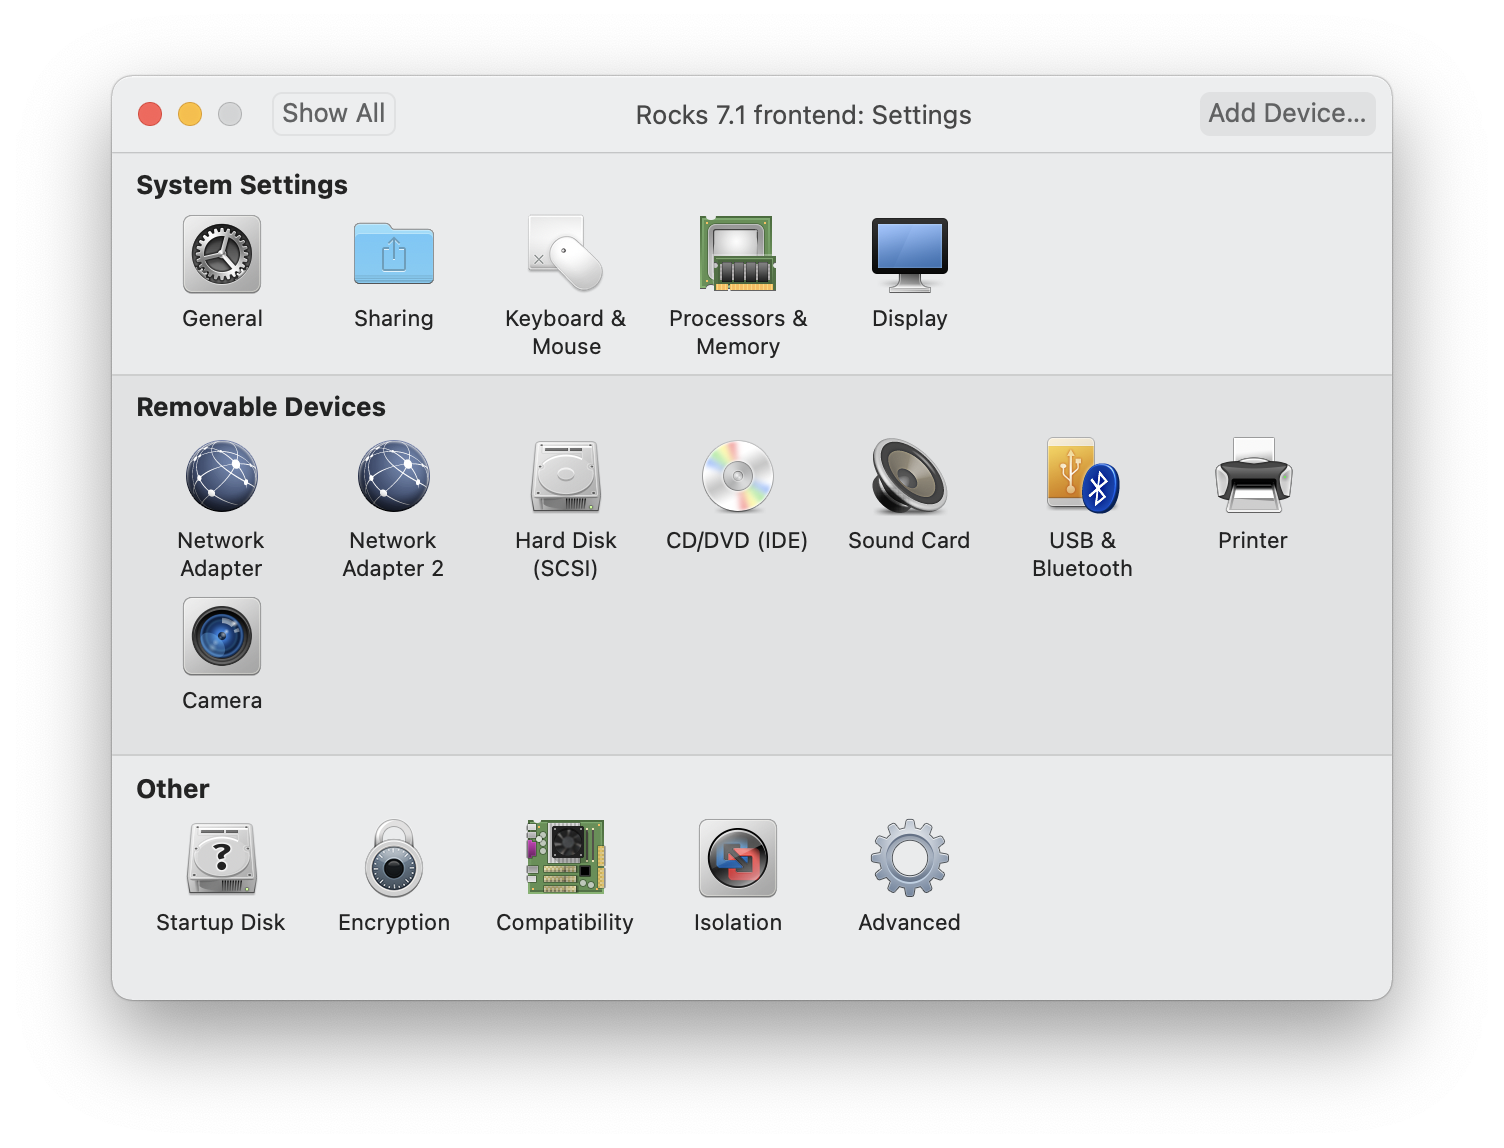
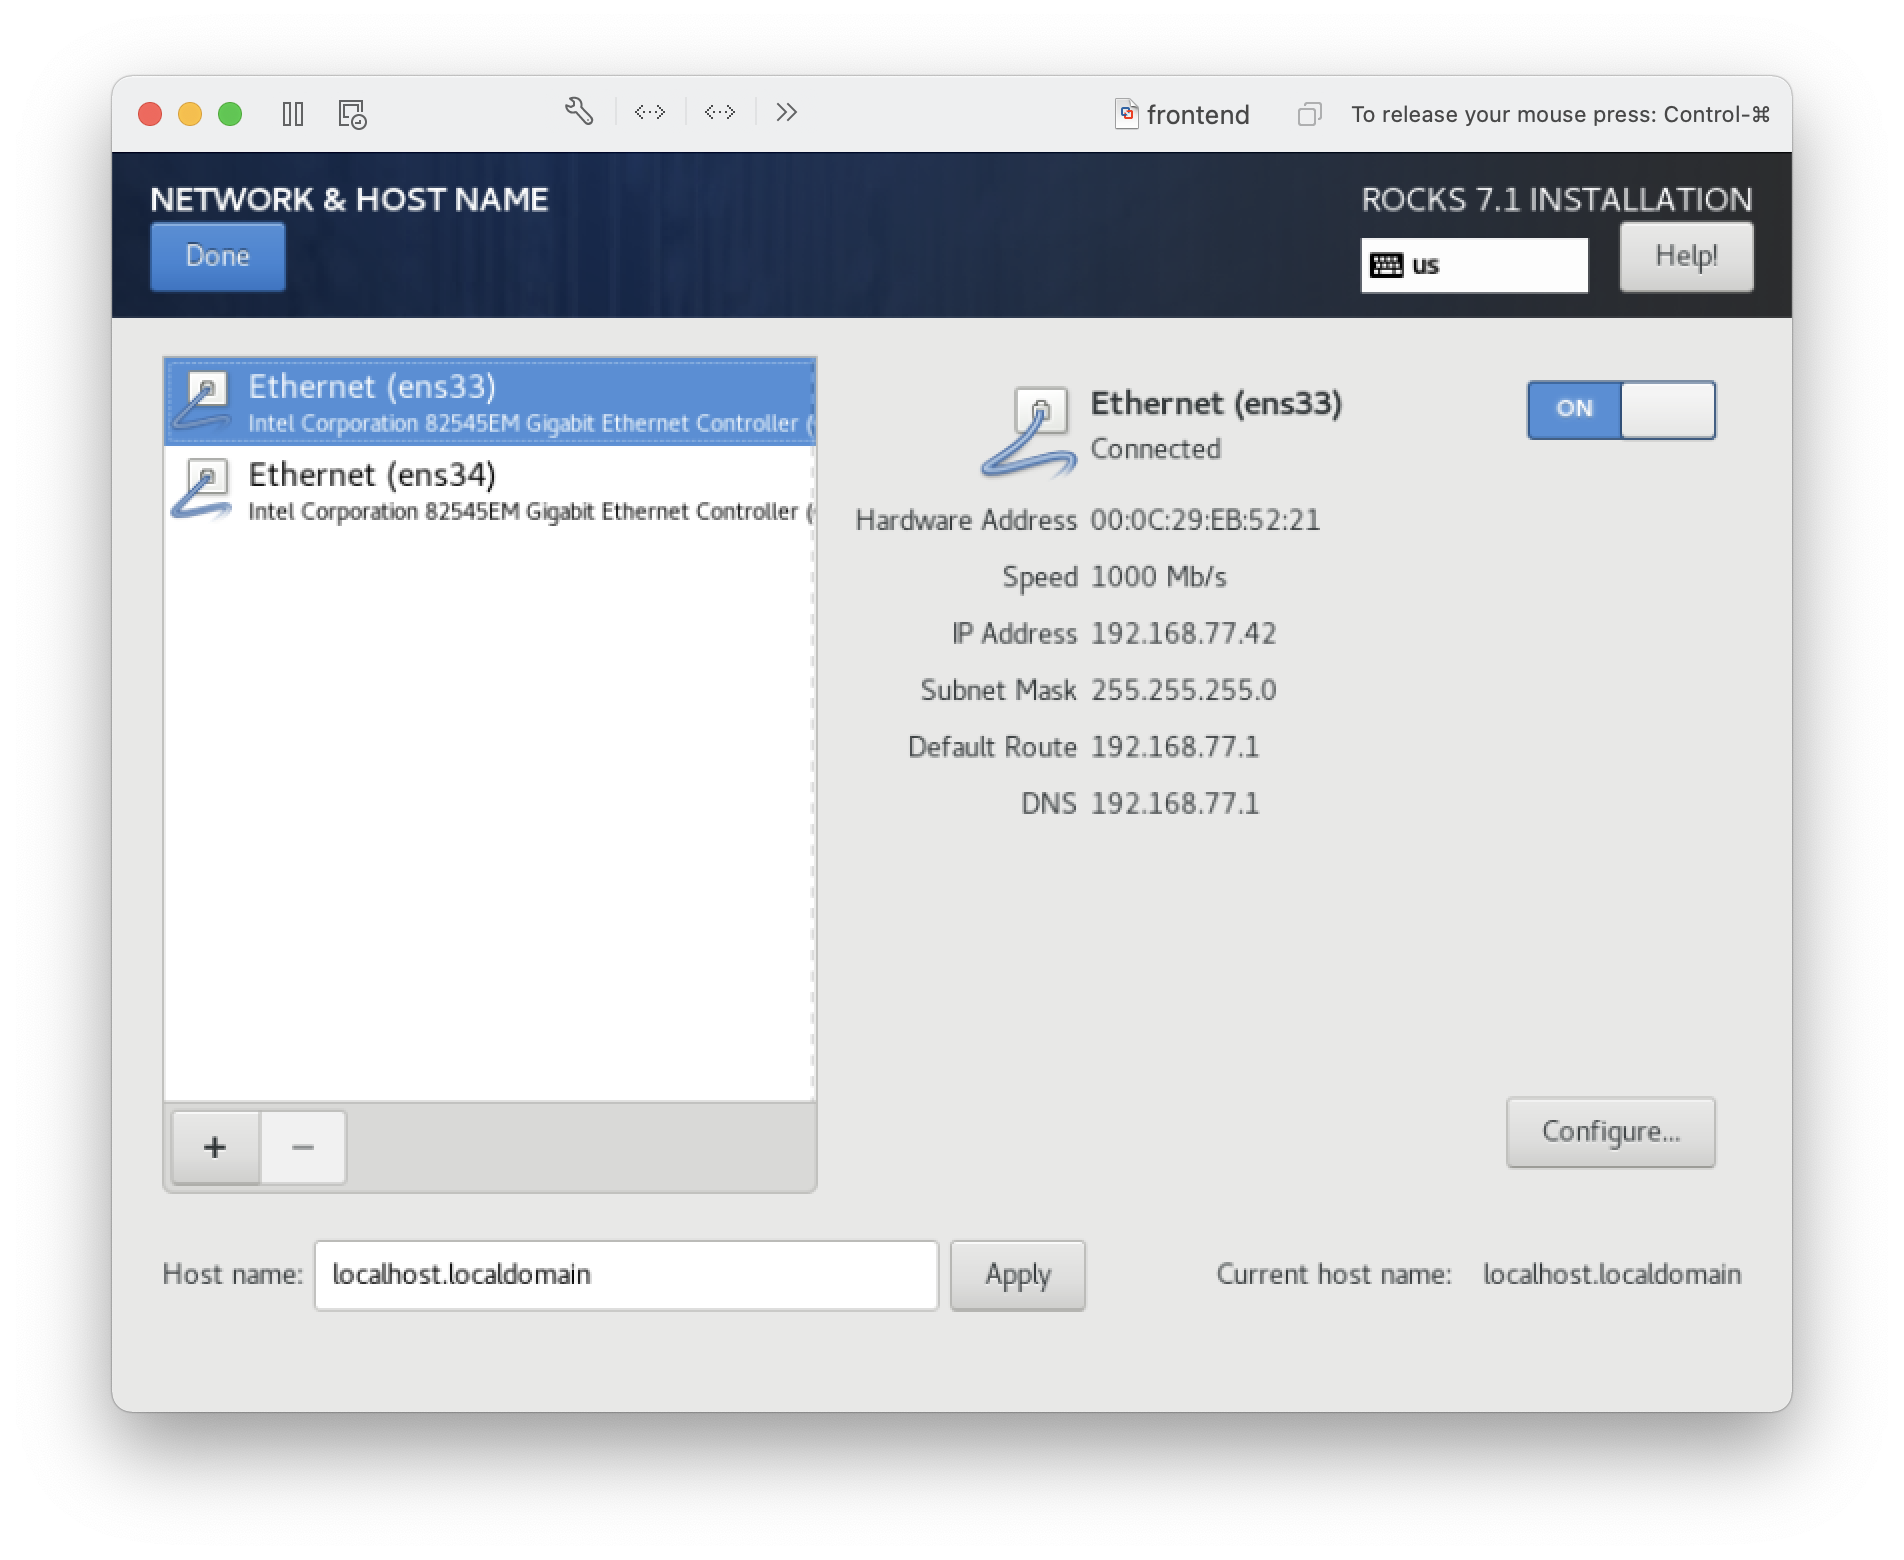
We can leave the first network adapter as it is. The frontend will use the same local IP address as the Mac (here 192.168.178.3). We can create a second network adapter in the VMware virtual machine. In the top-right corner of the VMware settings, click “Add Device” and select “Network adapter”. At install there will now be two network adapters. The first will be used for the external network, the second for the internal network.
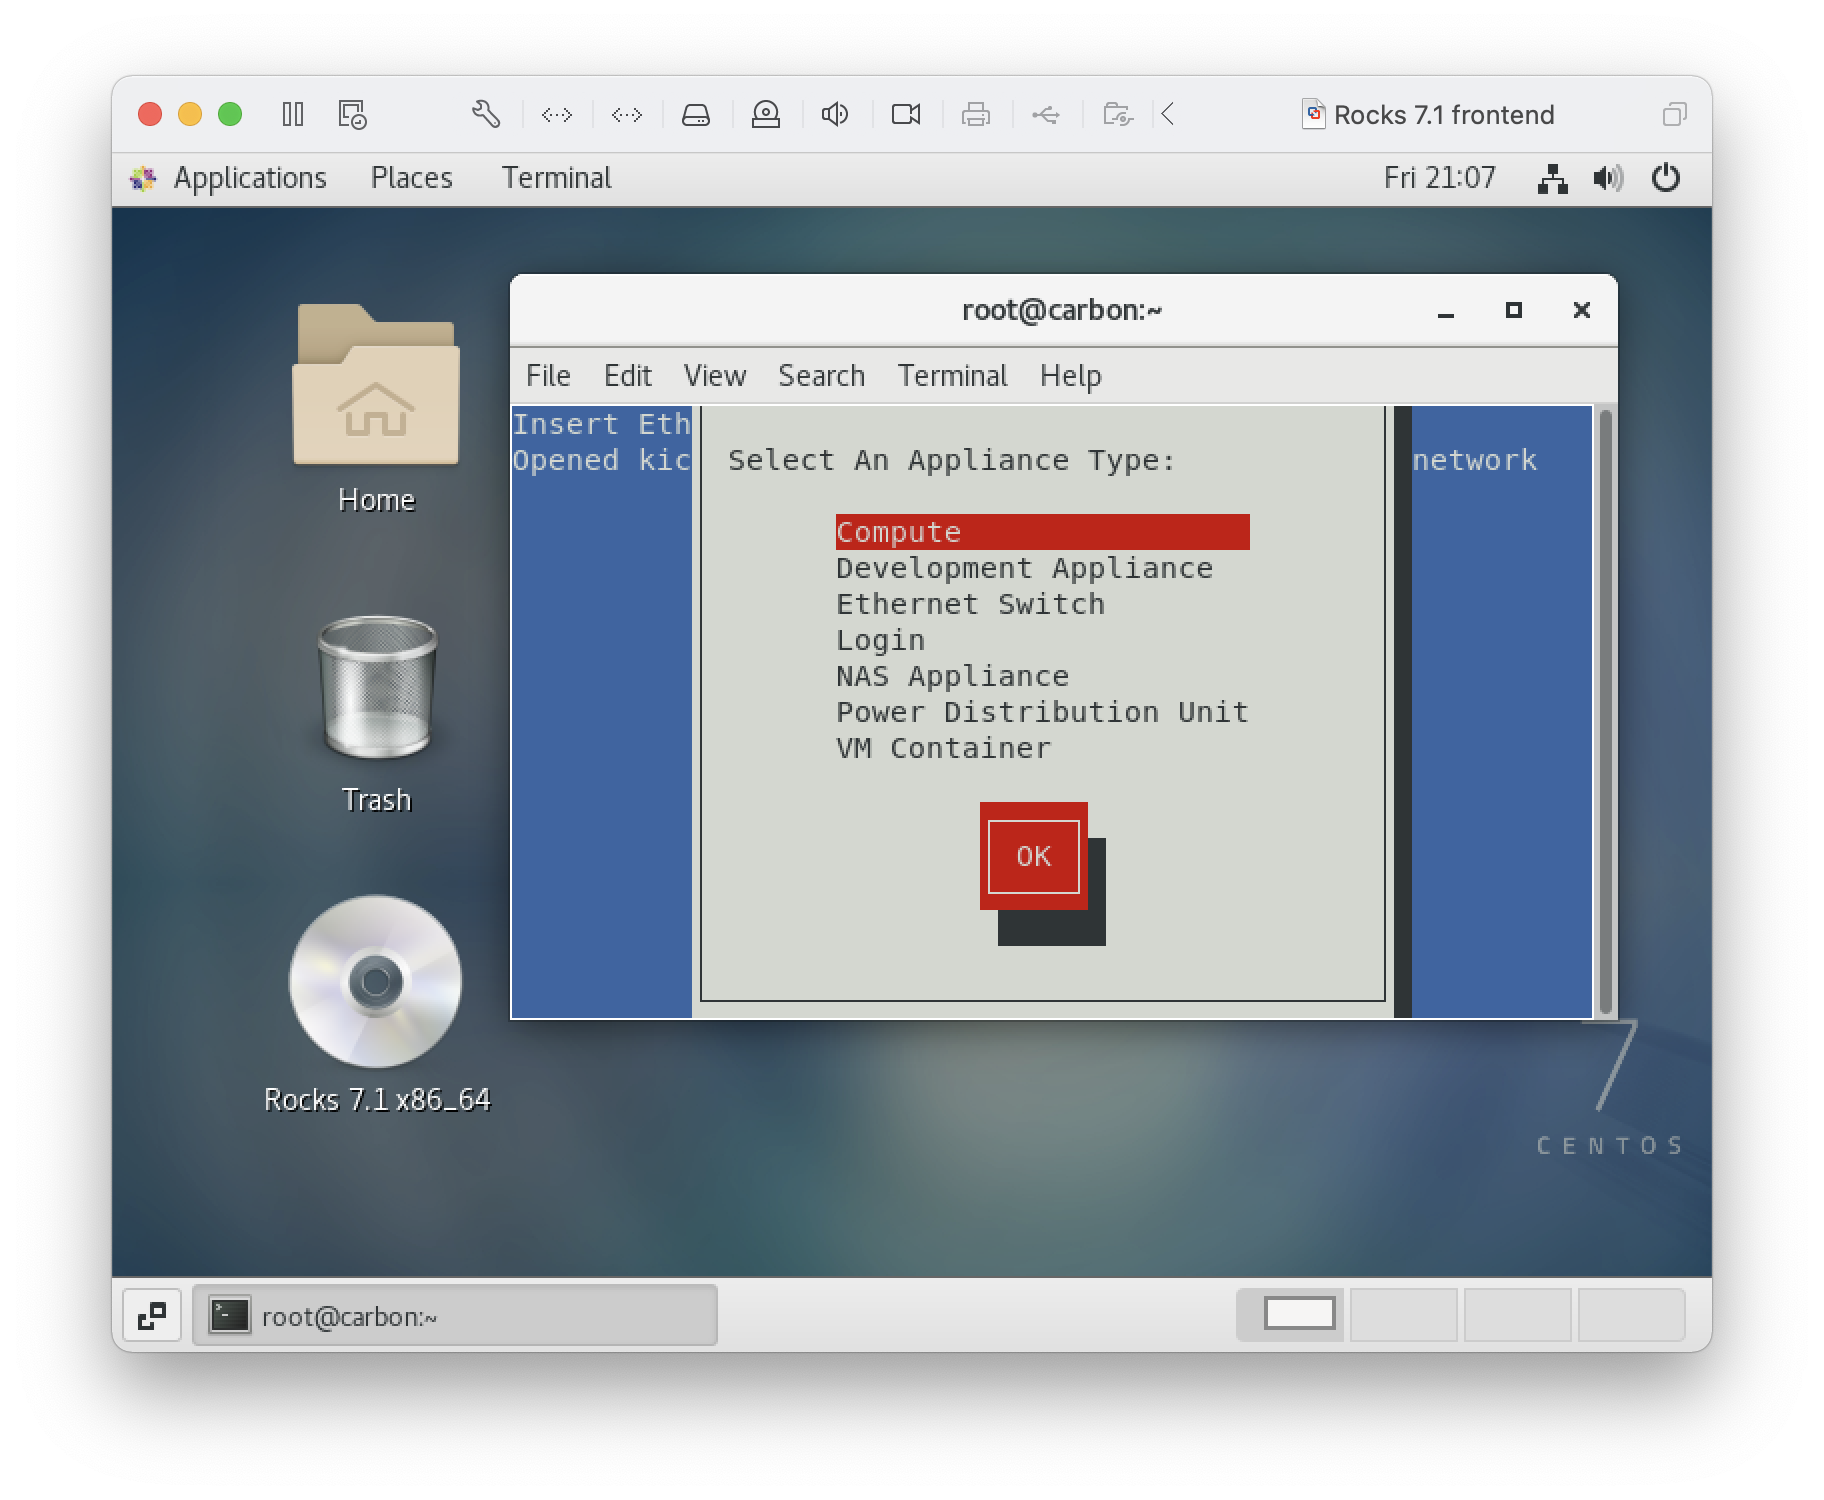
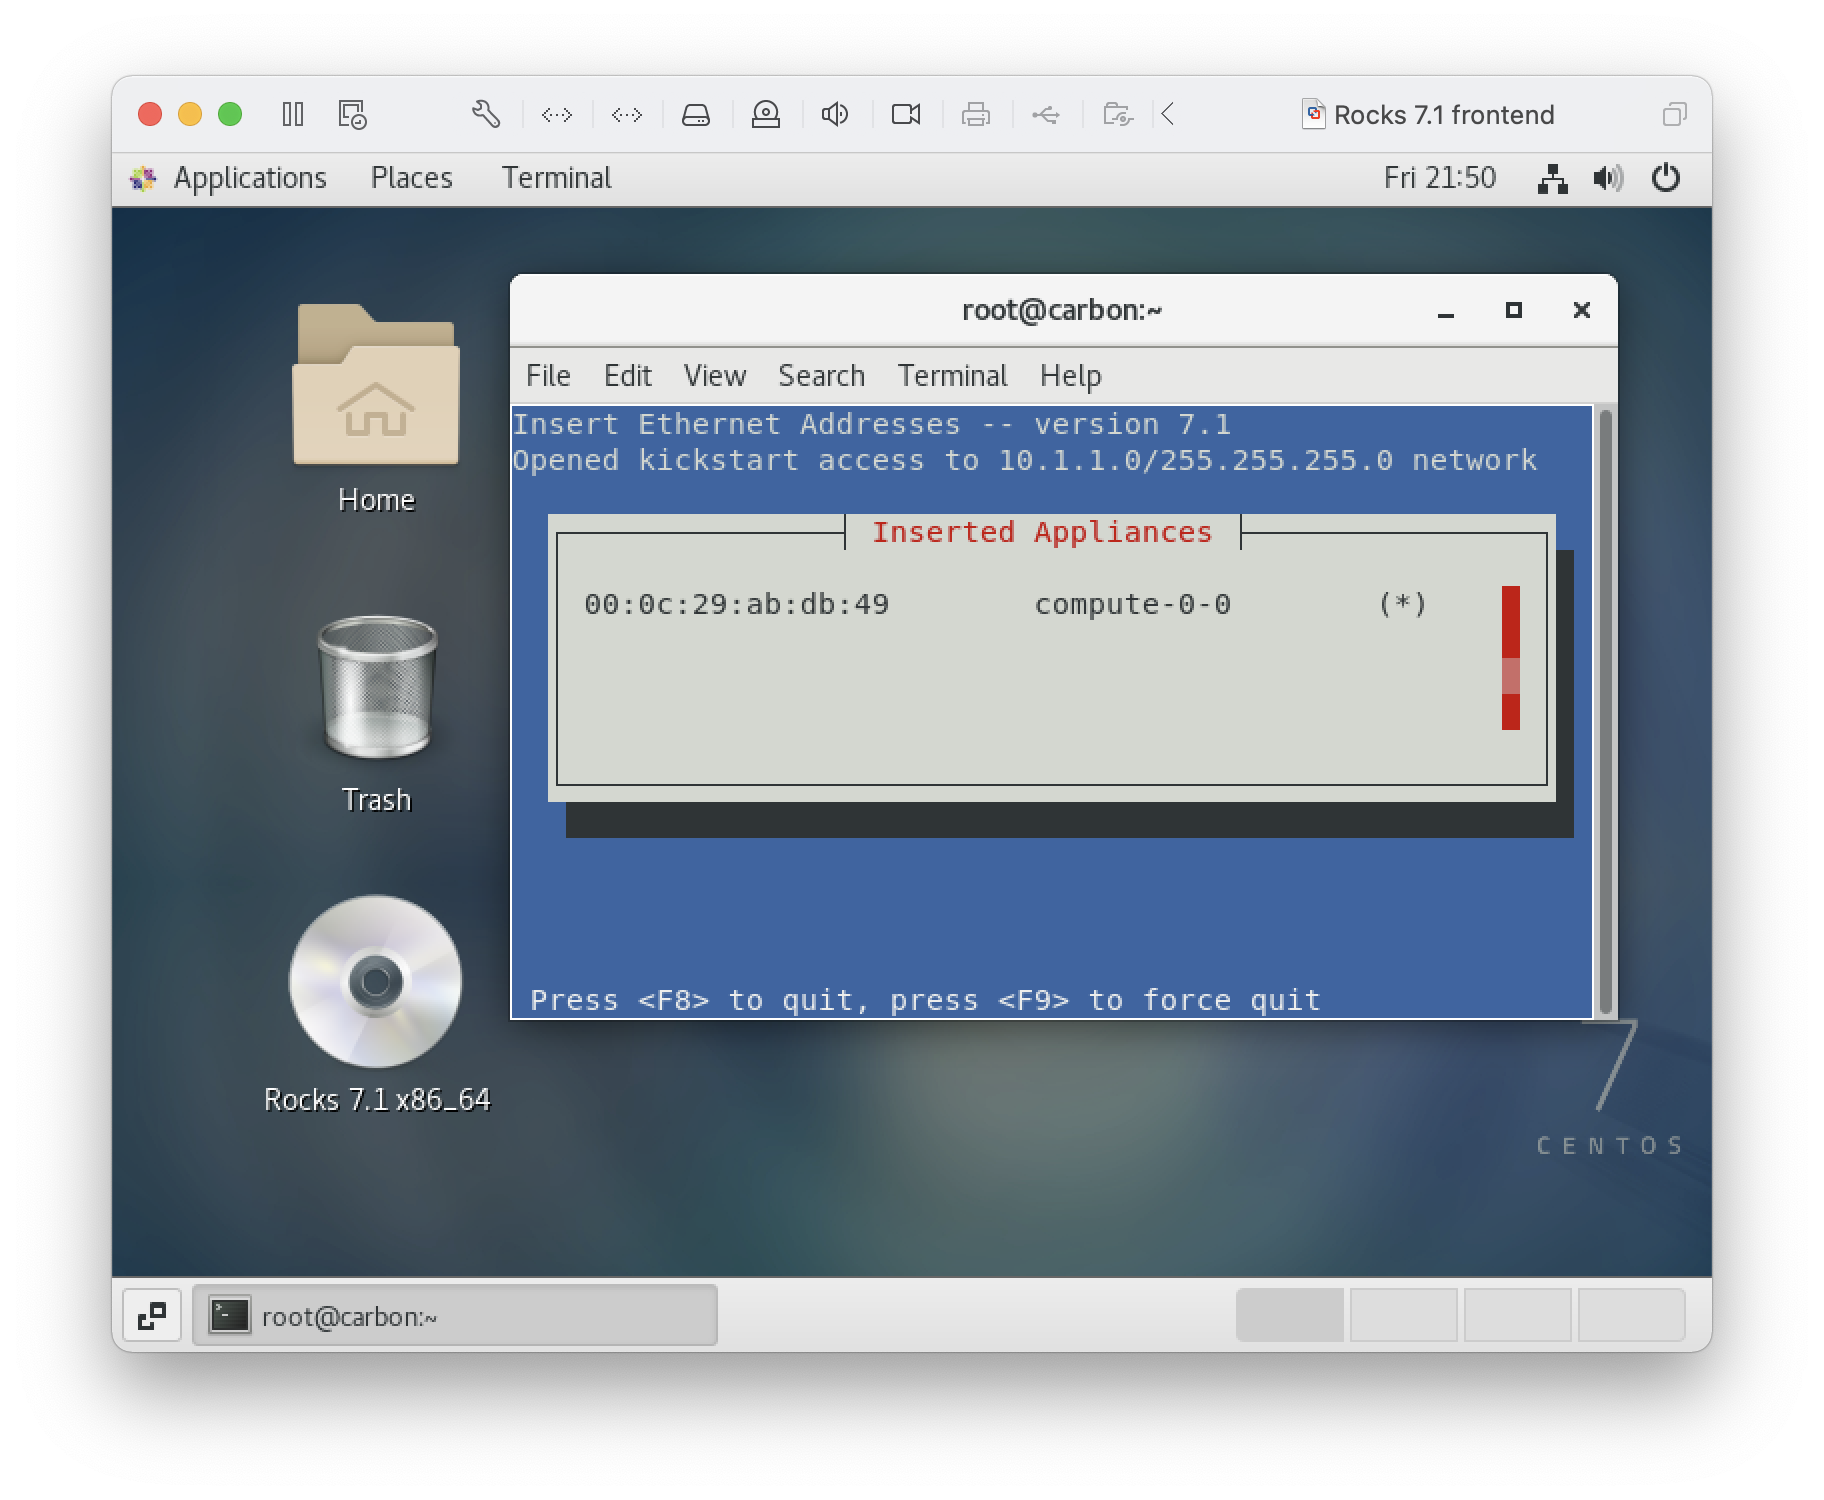
After setting up the compute node virtual machine, the compute node can be added to rocks management by running the ‘insert-ethers’ utility as root. The utility will show the rack and rank and denotes with a star (*) that the node has been found.
On the VMware side: the compute node
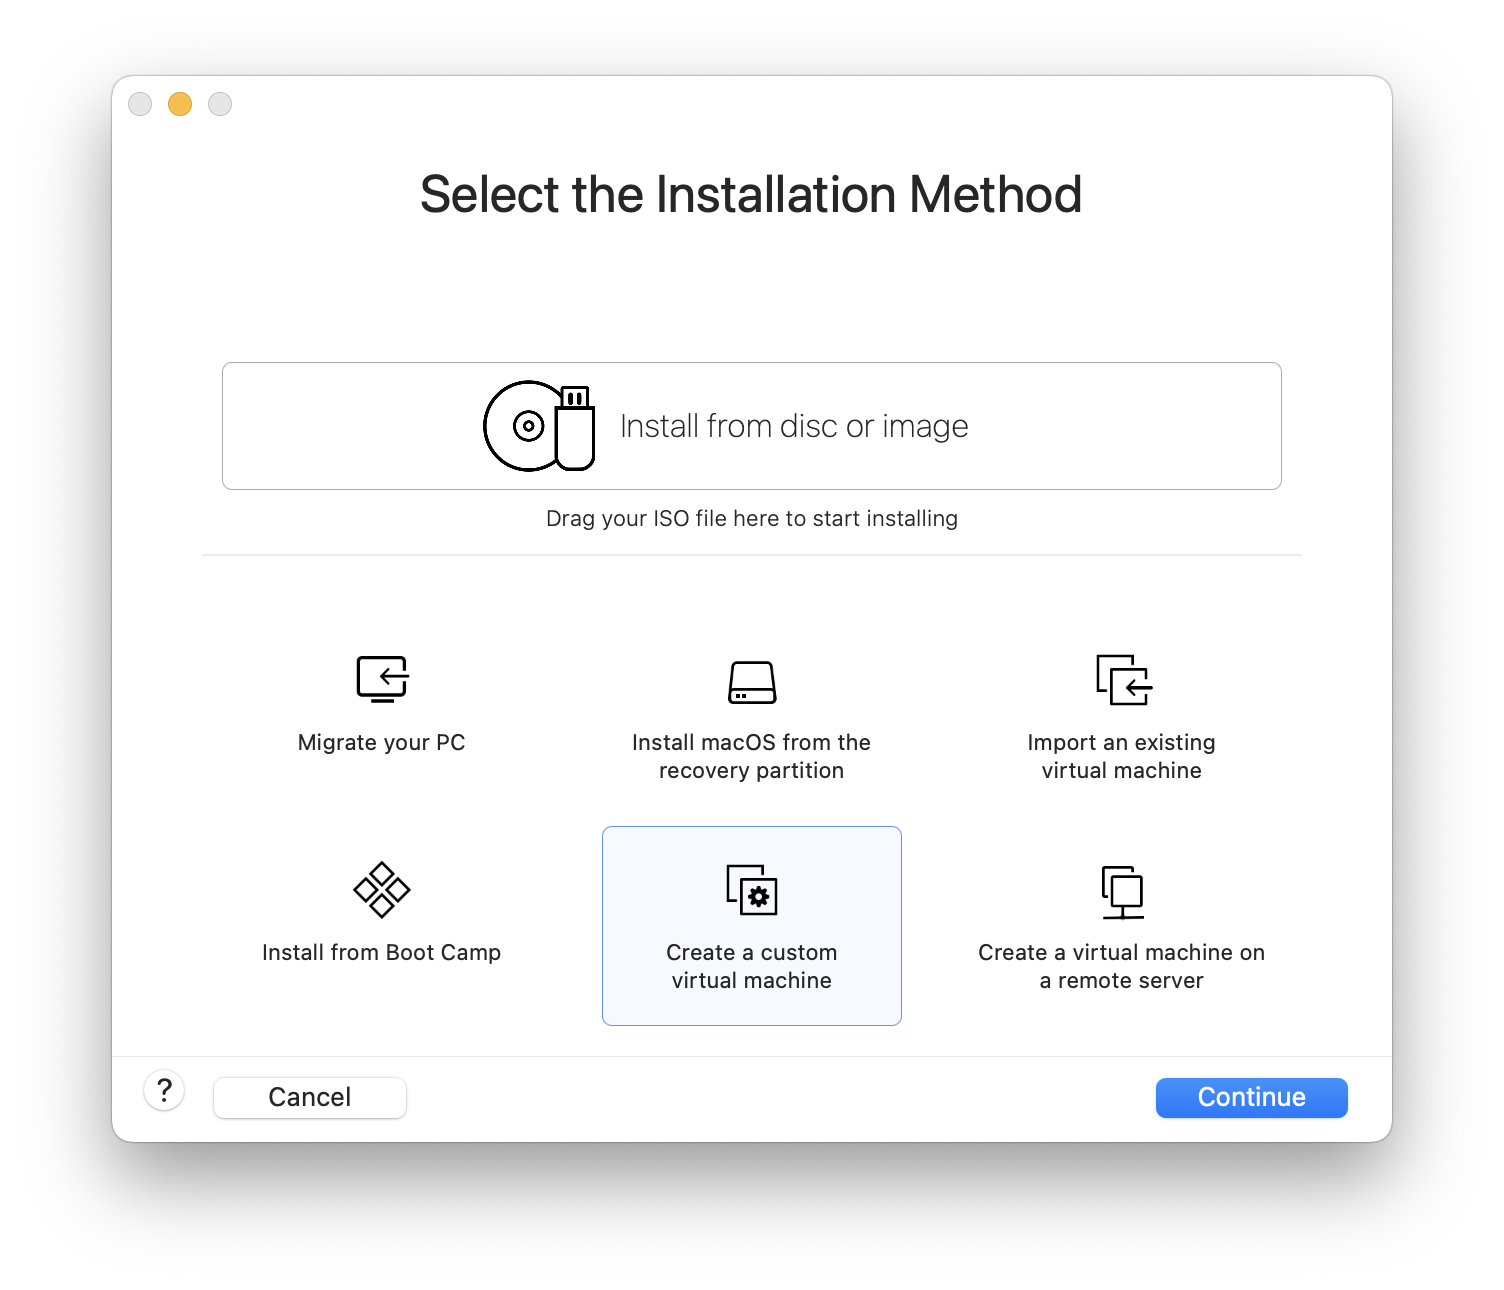
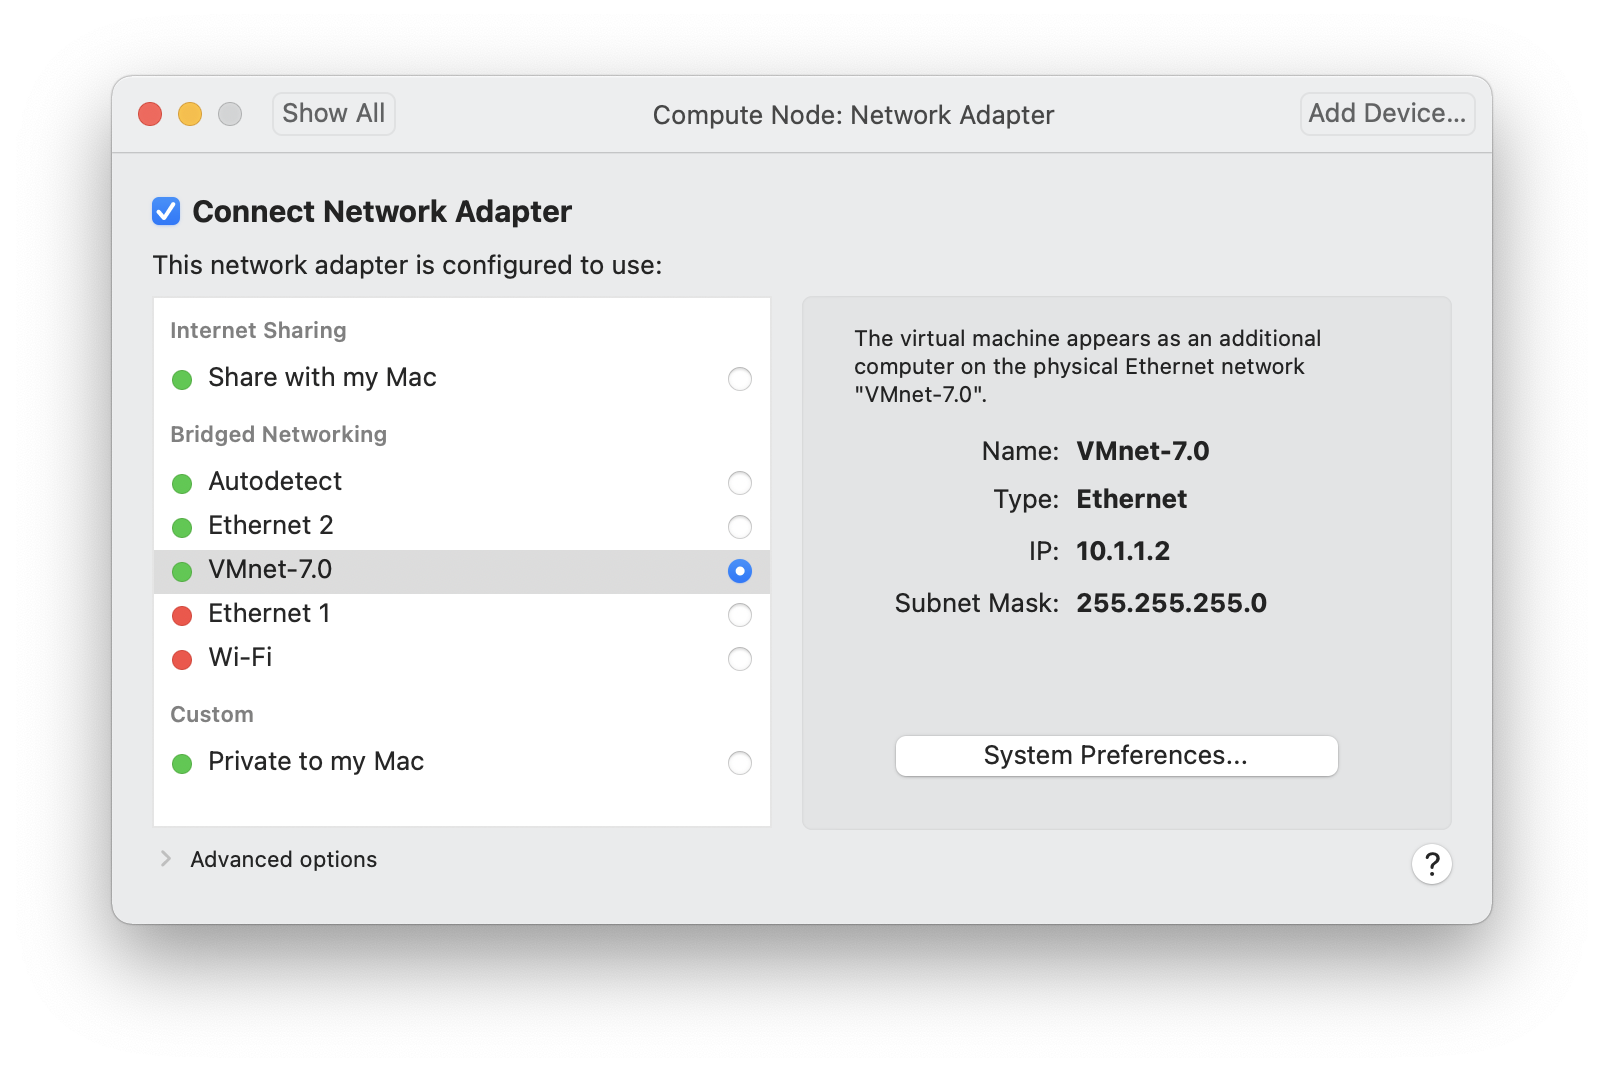
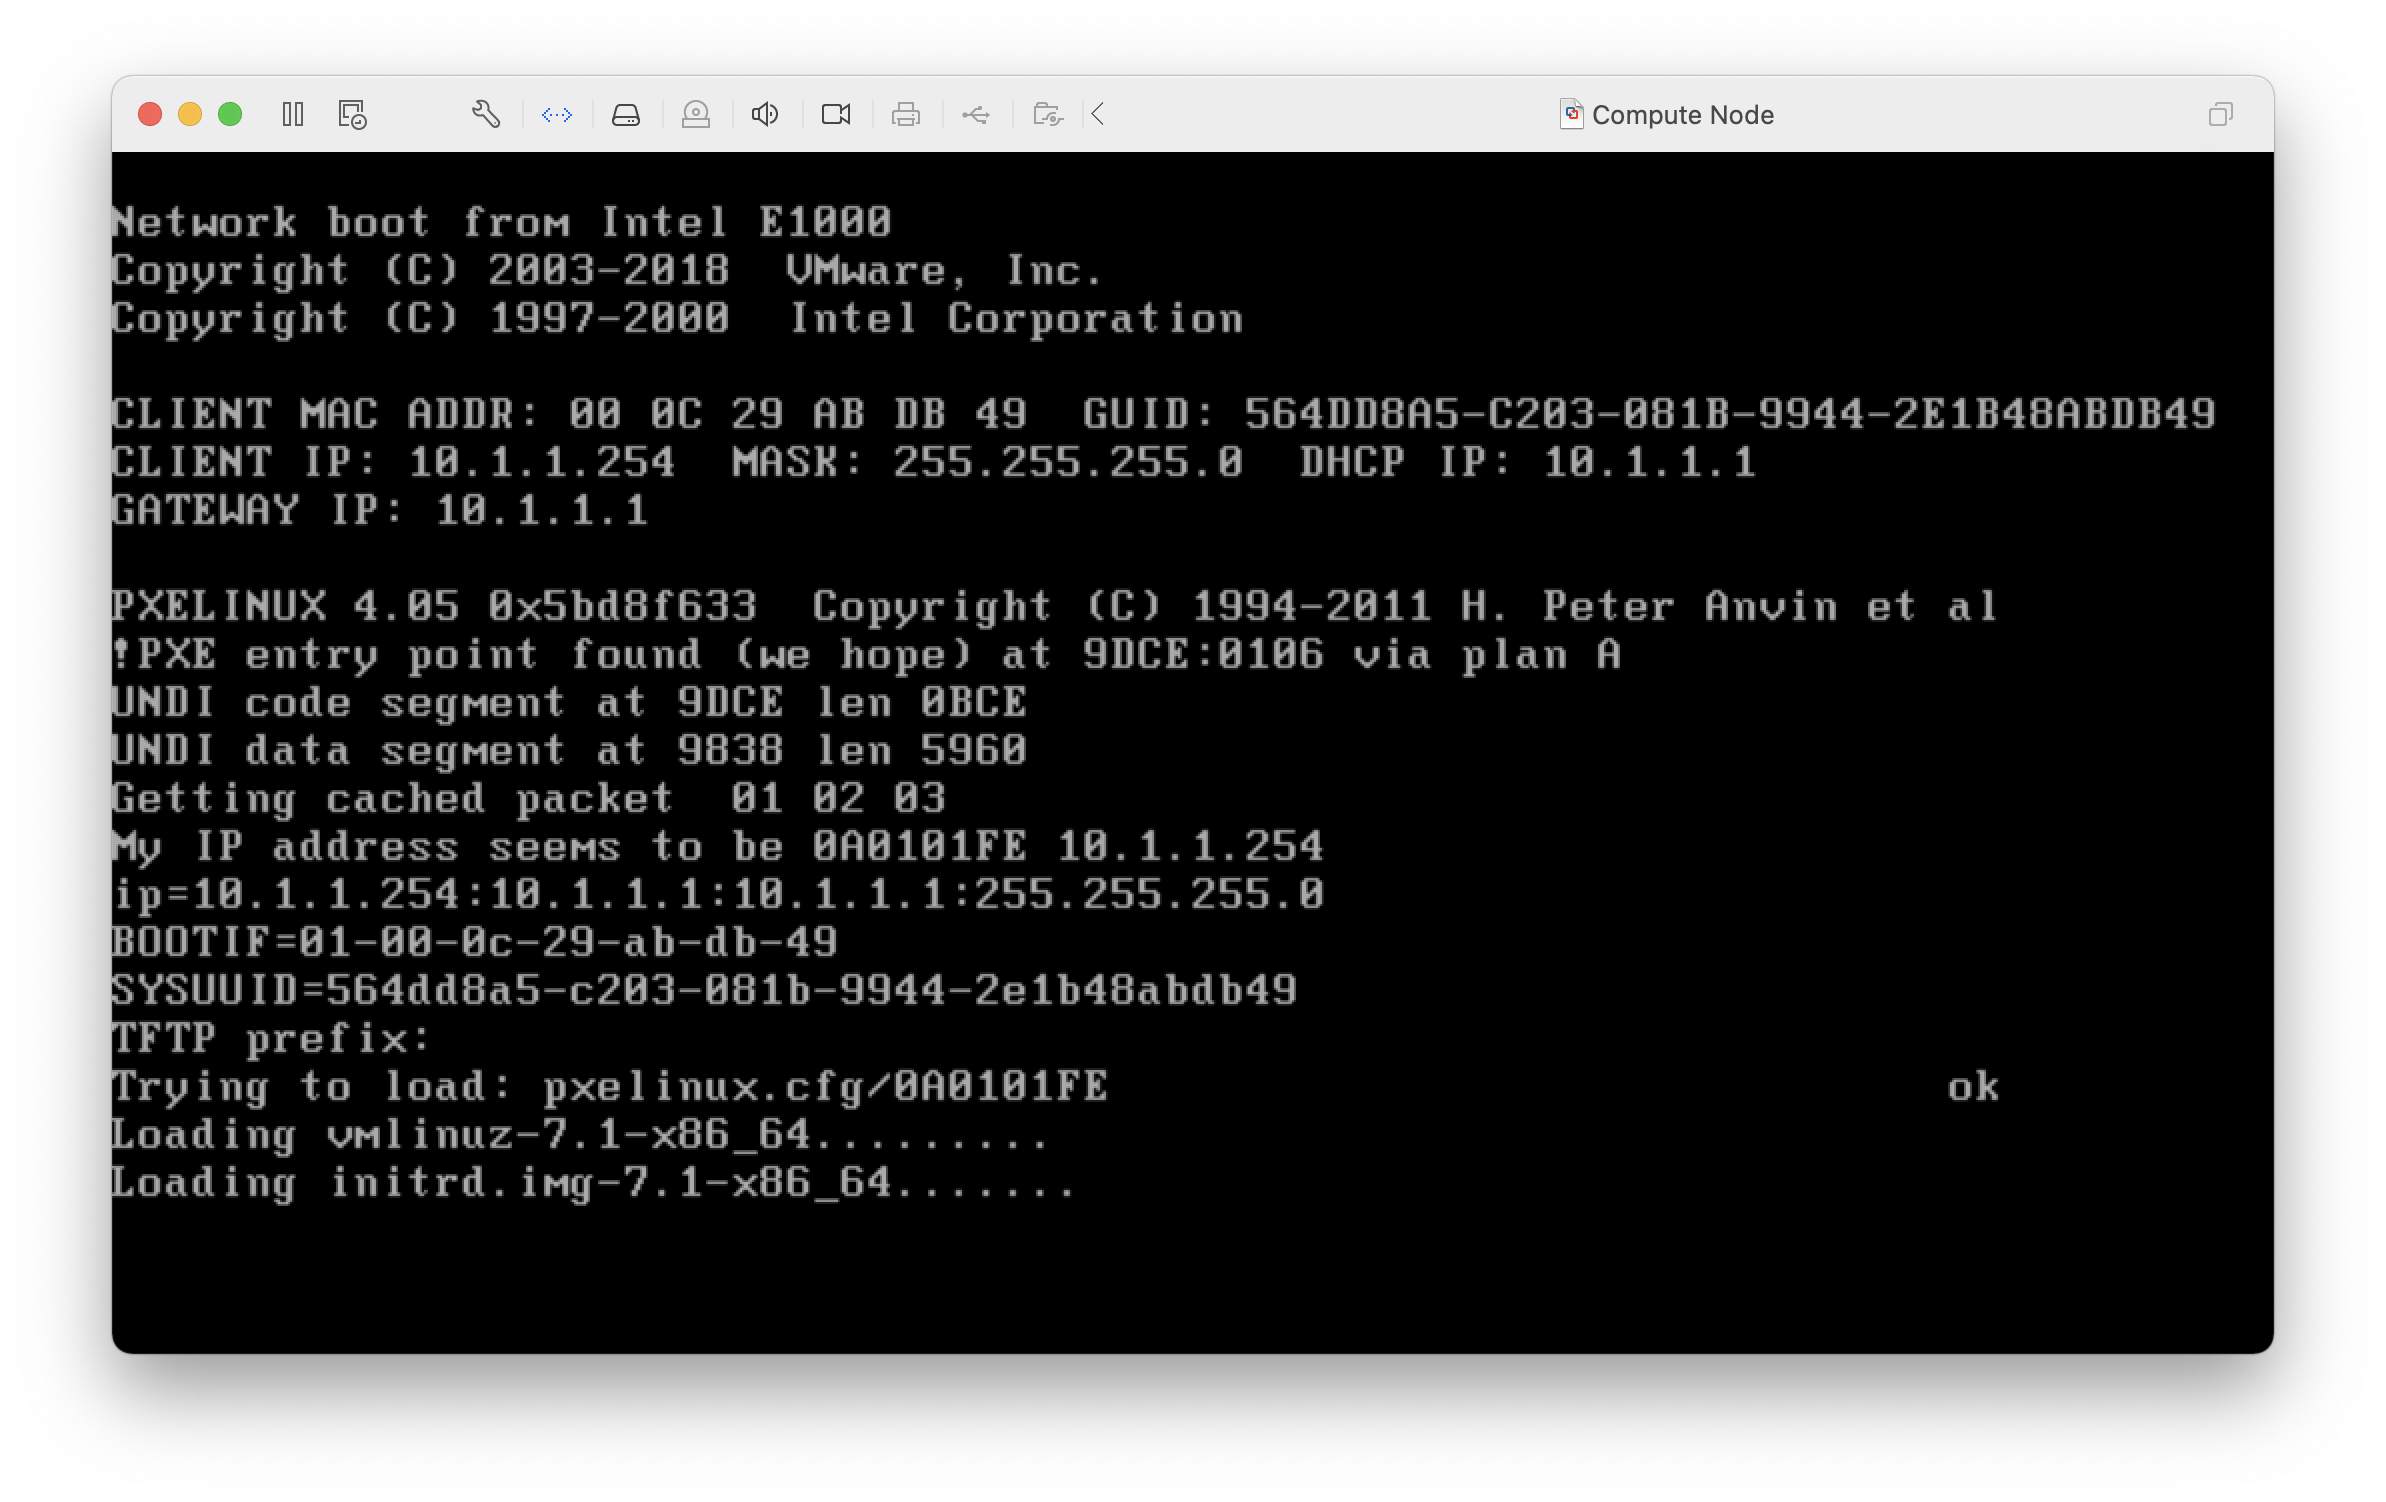
The compute node will be installed using PXE boot. We therefore create a custom virtual machine. The single network adapter needs to set to the internal VMnet-7.0 network.
To install the node for the first time and to insert into the rocks management system, the ‘insert-ethers’ utility need to be run on the frontend. Then the compute node can be booted using the PXE network boot.