Visual Studio Code is a free source-code editor made by Microsoft for Windows, Linux and macOS. Features include support for debugging, syntax highlighting, intelligent code completion, snippets, code refactoring, and embedded Git. C/C++ support for Visual Studio Code is provided by a Microsoft C/C++ extension to enable cross-platform C and C++ development on Windows, Linux, and macOS. The Code Runner extension allows execution of single files.  For project compilation, consisting of multiple files, the C/C++ Makefile Project extension can be used (and can be adapted for Fortran). Visual Code Studio can be downloaded from the website https://code.visualstudio.com/download. VS Code is first and foremost an editor, and relies on command-line tools to do much of the development workflow. There is basic support for html, css, javascript and typescript out of the baox. Support for other languages is supported via extensions. VS Code does not include a C/C++ or Fortran compiler or debugger. You will need to install these tools or use those already installed on your computer.

Table of Contents

Installing a C/C++/Fortran Compiler

On MacOS, first check if the compiler toolset is already present

which show the compiler options if the compiler is present, for example

If it is not present, then it will present an install panel. The installation can also be forced using

The Apple toolchain does not include a Fortran compiler. Using home-brew, it easy to install one. Homebrew can be installed using

and then installing the gcc package

which include the ‘gfortran’ compiler. Optional: also install python3 for Fortran IntelliSense (python has a Fortran implementation of the Language Server Protocol).

On linux, for example Ubuntu-type systems, the compilers can be installed using

On windows, a compiler needs to be installed. MSYS2 is a collection of tools and libraries providing you with an easy-to-use build system. Download MSYS2 from https://www.msys2.org. Follow the installation instruction steps, including step 7 which installs the C/C++/gfortran compiler and build utilities like ‘make’.

				
					(goto https://www.msys2.org)
(download the installer)
(run the installer)
(finish and a UCRT64 terminal environment will launch)
pacman -Syu
pacman -Su
pacman -S --needed base-devel mingw-w64-ucrt-x86_64-toolchain
pacman -S mingw-w64-ucrt-x86_64-gcc-fortran
pacman -S mingw-w64-ucrt-x86_64-python3-pip mingw-w64-ucrt-x86_64-python3-setuptools
/ucrt64/bin/pip3 install fortran-language-server
/ucrt64/bin/pip3 install fortls
pacman -S mingw-w64-ucrt-x86_64-lapack
pacman -S git unzip zsh vim


After step 5, the terminal will closed, and you need to reopen ‘MSYS2 MSYS’ from the Start menu. After step 7 and 8, you will have a fully functional build system and have access to ‘gcc’, ‘g++’, ‘gfortran’, and ‘make’ to build software. Step 12 and 13 show that the MSYS2 bash environment can be extended with a lot of packages. The installation of lapack allows the linking with ‘-llapack -lblas’ to solve for example eigenvalue problems. Git, unzip are useful utilities, and you could also for example change the default bash shell and use zsh (also used on mac).

Steps 8 and 9 install the fortran language server in python. There are two versions of python in MSYS2: (1) MSYS2 – POSIX applications emulated to work in Windows, and (2) MINGW – Windows native applications. We need the latter, since the IntelliSense in VS Code calls the fortran compiler (fortran.exe) and fortran language server (fortls.exe) from windows. MINGW refers to executables that are compiled using the MINGW GCC Compiler and target the Win32 API.

Install Visual Studio Code extensions

Launch Visual Studio Code. In the side bar (left), click the “Extensions” icon, and install the following extensions: 

Required extensions for intellSense, compiling, running and debugging C/C++/Fortran.

The C/C++ extension adds language support for C/C++ to Visual Studio Code, including features such as IntelliSense and debugging. The Makefile extension is generating a simple C/C++ project structure together with a Makefile which fits almost 99% of all small project’s needs. Code Runner adds a ‘Run Code’ button in the top-bar and in the context-menu when right-clicking on a file. The Fortran extensions for VS Code provides support for syntax highlighting, IntelliSense, and debugging.

(Update 2023: FORTRAN IntelliSense and Fortran Breakpoint Support are now included in Modern Fortran)

Settings

In the side bar (left), click the “Manage” icon, and select “Settings”. In the settings, search for “code runner”, the relevant items are the three items shown in the picture below. Make sure these three options are “on”. The “Run in Terminal” option is needed to also allow keyboard-input into a C/C++ program. If this option is off, the output will be immutably printed to the output-console. The terminal is more powerful and allows interactive use. The other two options are convenient to ensure that the files are always saved before compilation. Lastly, to avoid accidentally running selected code snippets, set ‘ignoreSelection’ to ‘true’.

In the settings, search for “executor map”, the relevant item is the “Code-runner: Executor Map”. Click “Edit in settings.json”.

The settings file lists the rule “Code runner” is using to compile source files. Line 1 is for C, and line 2 is the rule for C++. The default for C/C++ and fortran reads

 These are the rules that are carried out when you right-click on a file and execute ‘Run Code’ or when the ‘Run Code’ icon is clicked (it then uses currently the selected file to determine the rule). Modify these lines  and add a rule for the ‘makefile’

Save the file. The last line adds the rule for the Makefile. For all of these type of files, the directory is switched to where the makefile is, make is run, and if successful, then the ‘./myapp’ program is executed. One of the Supported customized parameters of Code Runner is $workspaceRoot: The path of the folder opened in VS Code. This is the location of the Makefile. The quotes around the $workspaceRoot are because a directory-name can contain spaces.

For Mac and linux, we are done. Windows requires an additional step, we need to set the internal terminal to the bash-shell of MSYS2. In settings, search for the integrated terminal shell for windows and edit the settings.json.

Search for the integrated terminal shell for windows.
Set the shell to the bash-shell from MSYS2.

Modify the ‘settings.json’ file to

				
					{
    "code-runner.executorMap": {
        "c": "cd \"$workspaceRoot\" ; make -f Makefile && ./myapp;",
        "cpp": "cd \"$workspaceRoot\"; make -f Makefile && ./myapp;",
        "FortranFreeForm": "cd \"$workspaceRoot\"; make -f Makefile && ./myapp;",
        "fortran-modern": "cd \"$workspaceRoot\"; make -f Makefile && ./myapp;",
        "fortran_fixed-form": "cd \"$workspaceRoot\"; make -f Makefile && ./myapp;",
        "fortran": "cd \"$workspaceRoot\"; make -f Makefile && ./myapp;",
        "makefile": "cd \"$workspaceRoot\"; make -f Makefile && ./myapp;",
    },
    "code-runner.saveFileBeforeRun": true,
    "code-runner.saveAllFilesBeforeRun": true,
    "code-runner.runInTerminal": true,
    "code-runner.ignoreSelection": true,
    "fortran.linter.compiler": "gfortran",
    "fortran.linter.compilerPath": "C:\\msys64\\ucrt64\\bin\\gfortran.exe",
    "fortran.fortls.path": "C:\\msys64\\ucrt64\\bin\\fortls.exe",
    "terminal.integrated.profiles.windows": {
        "PowerShell": {
          "source": "PowerShell",
          "icon": "terminal-powershell"
        },
        "Command Prompt": {
          "path": [
            "${env:windir}\\Sysnative\\cmd.exe",
            "${env:windir}\\System32\\cmd.exe"
          ],
          "args": [],
          "icon": "terminal-cmd"
        },
        "Git Bash": {
          "source": "Git Bash"
        },
        "MSYS2": {
          "path": "C:\\msys64\\usr\\bin\\bash.exe",
          "args": [
            "--login",
            "-i"
          ],
          "env": {
            "MSYSTEM": "UCRT64",
            "CHERE_INVOKING": "1",
            "PATH" : "/ucrt64/bin:/usr/local/bin:/usr/bin:/bin:/c/Windows/System32:/c/Windows:/c/Windows/System32/Wbem:/c/Windows/System32/WindowsPowerShell/v1.0/" 
          }
        }
    },
    "terminal.integrated.defaultProfile.windows": "MSYS2",
    "terminal.integrated.env.windows":
    {
        "MSYSTEM": "UCRT64",
        "CHERE_INVOKING":"1",
        "PATH" : "/ucrt64/bin:/usr/local/bin:/usr/bin:/bin:/c/Windows/System32:/c/Windows:/c/Windows/System32/Wbem:/c/Windows/System32/WindowsPowerShell/v1.0/"         
    }
}


and save the file. Also the fortran executable and the fortran language server are set to the ones of MSYS2. Note that the “code-runner” lines might already be present. The setting of options via the GUI is identical to setting the options in this json file.

Creating and Compiling a Small C++ project

The first step is to create an empty directory, for example named ‘Project’, and opening that folder as a new project.

Next, initialize the project in the current working directory with Ctrl+Shift+P on a Windows/Linux or CMD+Shift+P on a Mac and choose C/C++ Make: INIT Project and C++ Project.

Choose 'C/C++ Make INIT Project'
Choose 'C++ Projects'

Now the Makefile is created for a C++ project consisting of cpp and header files. The Makefile settings are fine as they are. The executable program will be named ‘myapp’. The compiler settings can be modified, for example to change the C++ version and warning flags, or to add debug compiler flags.

The create Makefile: Makefile settings and compiler settings can be customized. The remainder is set to fit almost 99% of all small project's needs.

To start coding on a new project, set the compiler flags to ‘debug’ settings to get the most help out of the compiler (and debugger). Later these compiler flags can be modified for ‘release’ settings to optimize the code for speed.

New files need to be created in the ‘src’ directory. Make sure to select the ‘src’ directory (and not the ‘src/include’ directory), and create a new file.

Name the file “main.cpp” and let’s add a prototypical Hello World C++ program.

To compile and run the code, right-click on the “Makefile” and “Run Code”.

The Makefile extension performs the same steps as we would have to do manually to compile the source. But the Makefile extension becomes very convenient once the codes grows in size using multiple files. The compile steps and the result of running the program can be seen below.

Modification for Fortran

The same Makefile framework can be used for Fortran. The first difference is that files have the ‘.f90’ extension in Fortran. Files with this extension will automatically be in ‘free format’ (this new form uses a much wider character set and it allows much greater freedom in laying out statements on a line.). The second difference is the Makefile is changed to reflect the settings needed for compilation of Fortran files.

Makefile settings for Fortran.

IntelliSense

But hovering over a defined subroutine, you get information on the arguments and the types. Also, right-click and “Go to Definition” will take you to the implementation. 

IntelliSense for C++ in action.
IntelliSense for Fortran in action.

Debugging

The setup of debugging is straightforward. The first time the Debug-Icon is clicked a setup will appear. 

A file ‘launch.json’ will be created in the project. The only change needed on MacOS is to set the ‘program’. After saving, using debug breakpoints should be fully functional.

MacOS debugging setup: set 'program' to '${workspaceFolder}/myapp'.

On windows, an additional modification is needed: the path to the gdb debugger from MSYS2 needs to be set.

Windows debugging setup: set 'program' to '${workspaceFolder}/myapp', and set the'miDebuggerPath' to the MSYS2 gdb-debugger 'C:\\msys64\\mingw64\\bin\\gdb.exe'.

With these modifications, debugging and breakpoints work. You can “step over”, “step into”, “step out”, and have options to “continue”, “pause”, and “stop”.

Debugging: breakpoint in action.

Automatically Compile Project before Debugging

First add the ‘preLaunchTask’ called ‘build’ to the launch task. Next, select “Terminal” in the menu, and “Run Build Task”. Since no task is configured yet, a popup appears. Create ‘tasks.json’ from a template. Choose ‘others’ as template, and configure the build task.

Add the 'preLaunchTask' to the launch task.
Choose configure build task.
Create 'tasks.json' from template.
Choose 'Others'.

Next the scripts needs to edited to look like below.

Configure build task, modify the task to simply do a 'make' step.

The type is a shell-script. The ‘presentation’ is set to ‘silent’ and ‘shared’ which means the terminal will be brought to the front only in case of an error, and that the output of this and other tasks will be shown in the same terminal, respectively. The ‘group’ is set to ‘build’ which means it can be executed with ⇧⌘B

When starting the debugger, the preLaunchTask will now automatically be run first (compiling the project).

Using WSL instead of MSYS2

Instead of using MSYS2, it is also possible to make use of the WSL system, if that is installed. This is a more appropriate setup if your files and projects are located in the WSL environment. The ‘Remote WSL’ extension is required to make this work. After installing it, a green button appear at the lower left bottom. Choose ‘remote-WSL Reopen Folder in WSL’ to open a folder in your WSL system. After a while, in your VS code interface, it will ask you whether you would like to install the C/C++ and Fortran extensions also in the WSL-Ubuntu.

The C/C++/Fortran extension needs to be installed both locally and on the WSL side.

Inside WSL, the C/C++/Fortran compilers needs to be installed, as well as the fortran language server. Run inside WSL

To make use of the WSL compilers, the setting ‘settings.json’ can be adjusted and modified for WSL.

Uninstalling

To uninstall VS Code on macOS, delete the directories

To uninstall MSYS2 and VS Code on windows run

To remove the VS Code settings and to remove the extension, delete the two following user folders 

Sources

GCC & clang on windows with Visual Studio Code + bash terminal + debugging!
GCC & clang on windows with Visual Studio Code + bash terminal + debugging!Daniel Elliott Jones
Read More
Daniel Elliott Jones explains how to setup MSYS2 for windows and set the internal terminal to the bash terminal.
C++ Tutorial for Beginners #2: Visual Studio Code - Makefile & Multi File Extension | 2021 | (Linux)
C++ Tutorial for Beginners #2: Visual Studio Code - Makefile & Multi File Extension | 2021 | (Linux)SavvyNik
Read More
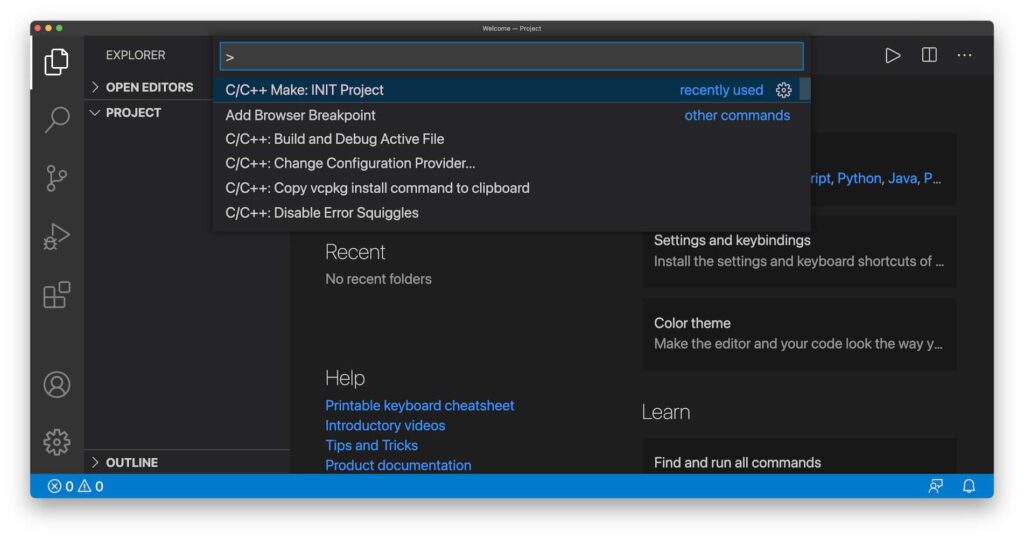
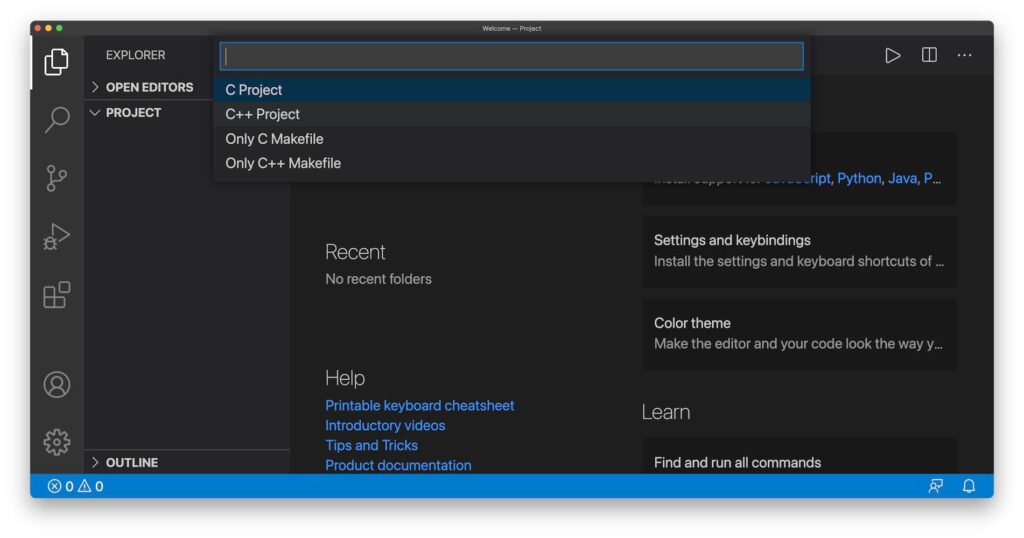
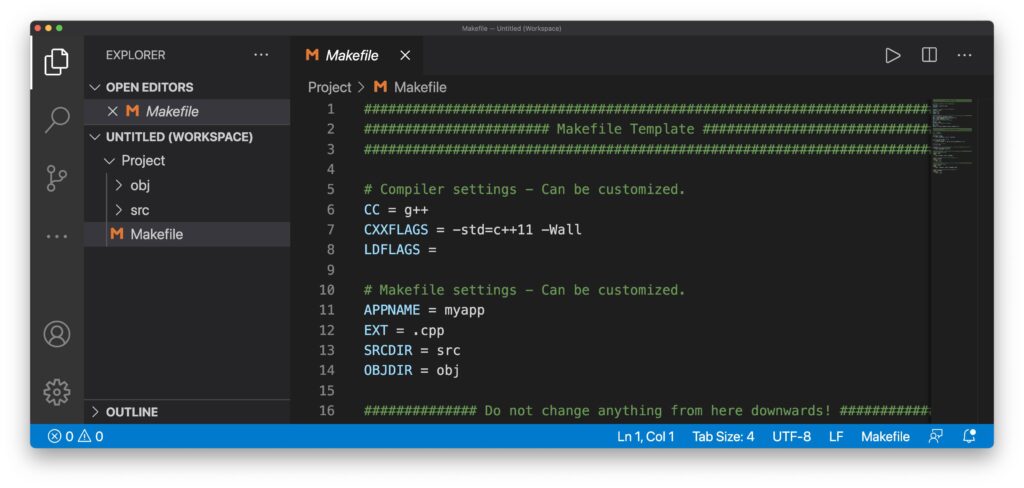
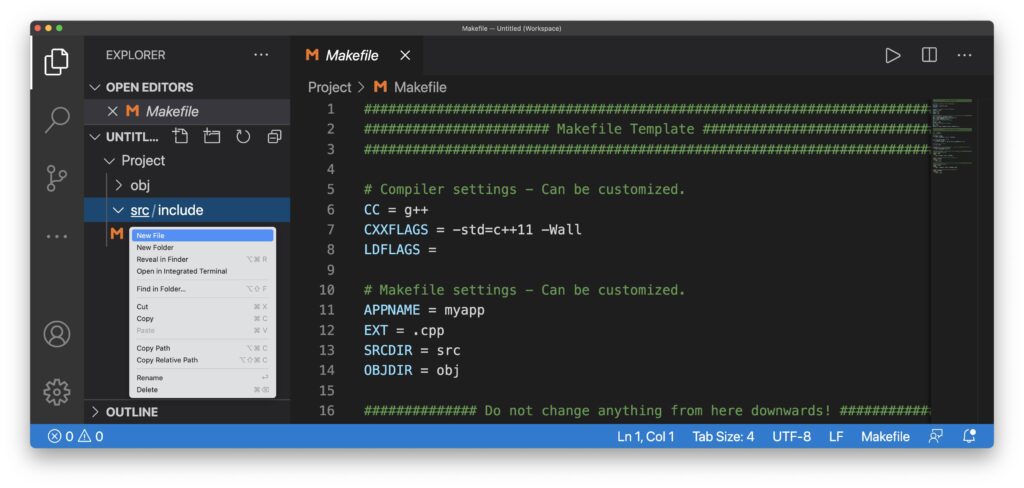
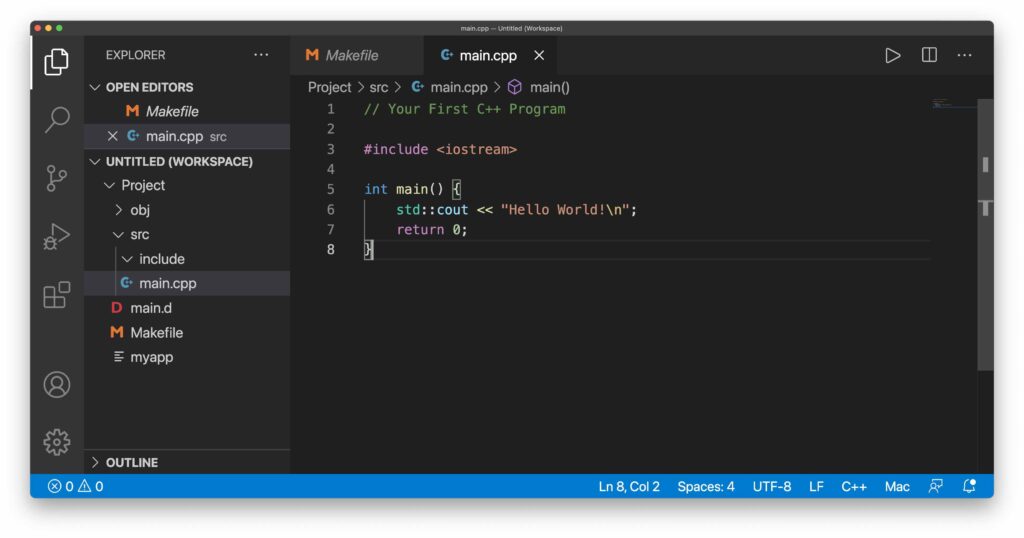
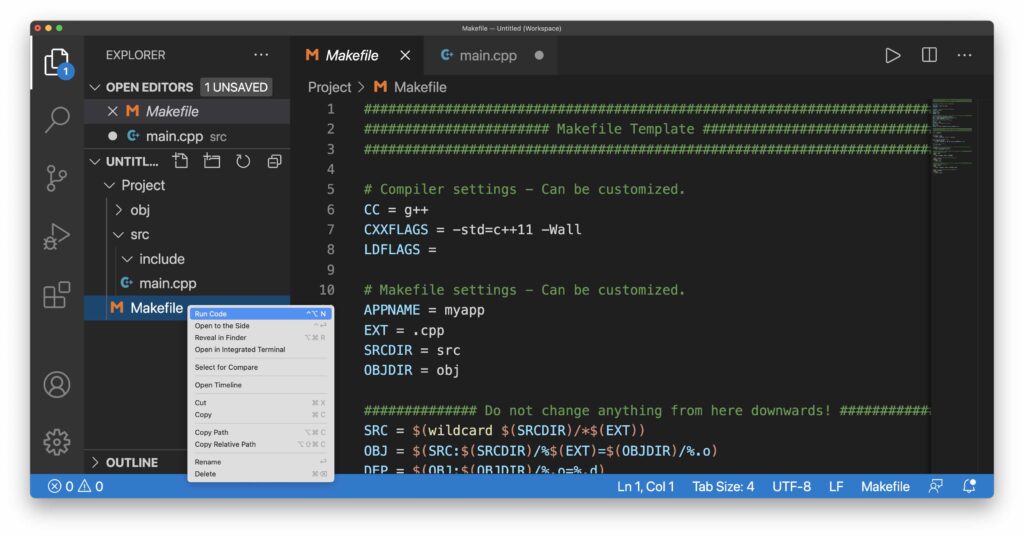
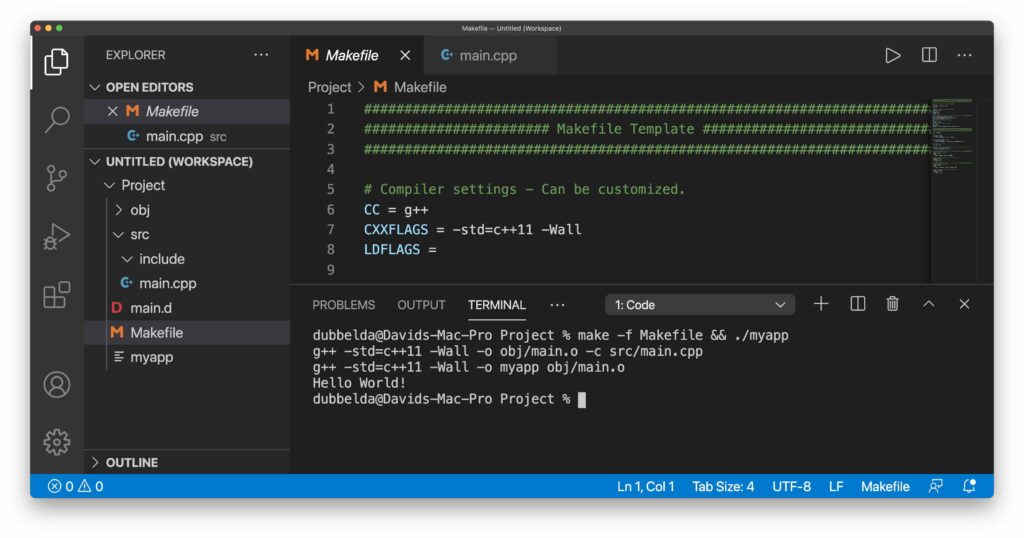
SavvyNik explains the Makefile Project Extension for Visual Studio Code. This C++ Tutorial is intended for C/C++ Beginners with Programming in 2021 and will help you use Visual Studio Code with Programming a C/C++ project.Since Visual Studio Code doesn’t have an easy way of compiling multiple files together we will install a new extension called C/C++ Makefile Project. This extension will help generate a makefile for our project and allow us to compile multiple source files together very easily no matter home many we have. This will be useful down the road.
VS Code for Fortran Ep.2: Extensions & Rulers
VS Code for Fortran Ep.2: Extensions & RulersLukas Lamm
Read More
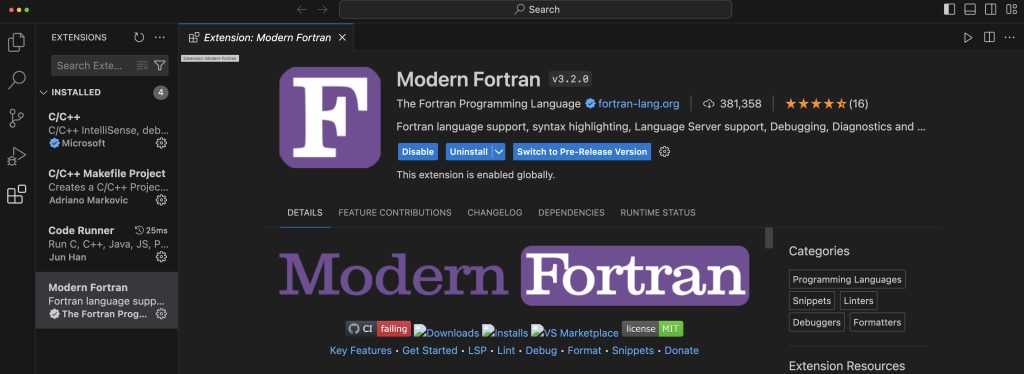
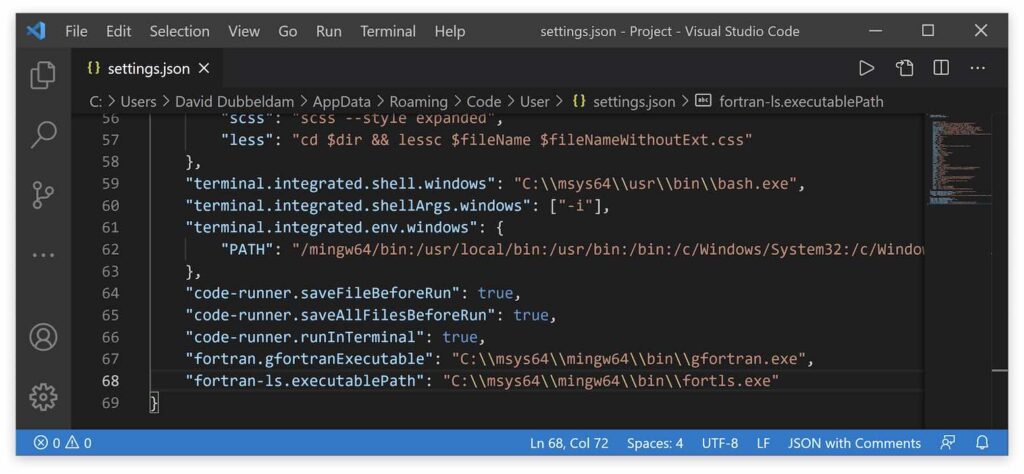
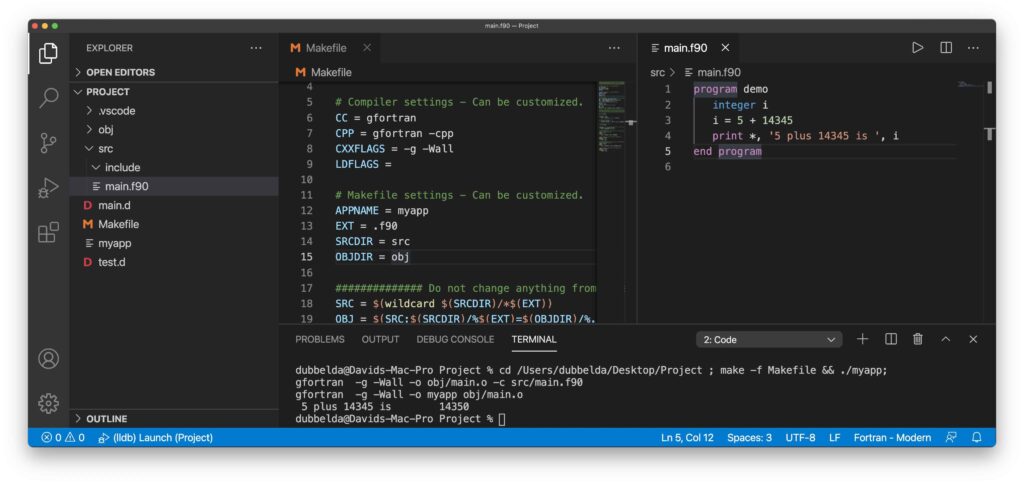
The second episode of this series shows you how to set up two important extensions for Fortran in VS Code. You will also learn how to set up rulers in VS Code to avoid line truncation errors. Duration: 8 minutes.
Debugging C++ on VSCode w/ WSL
Debugging C++ on VSCode w/ WSLEECS 281
Read More
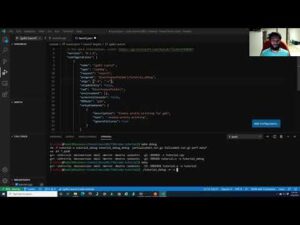
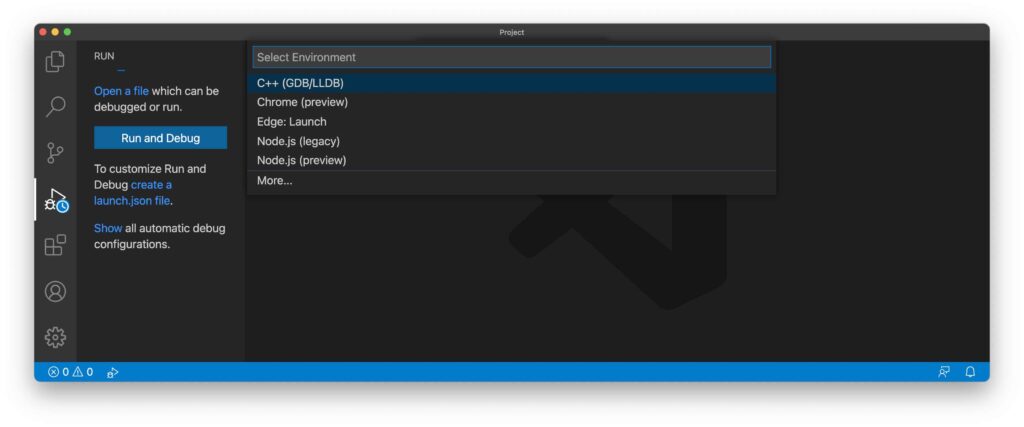
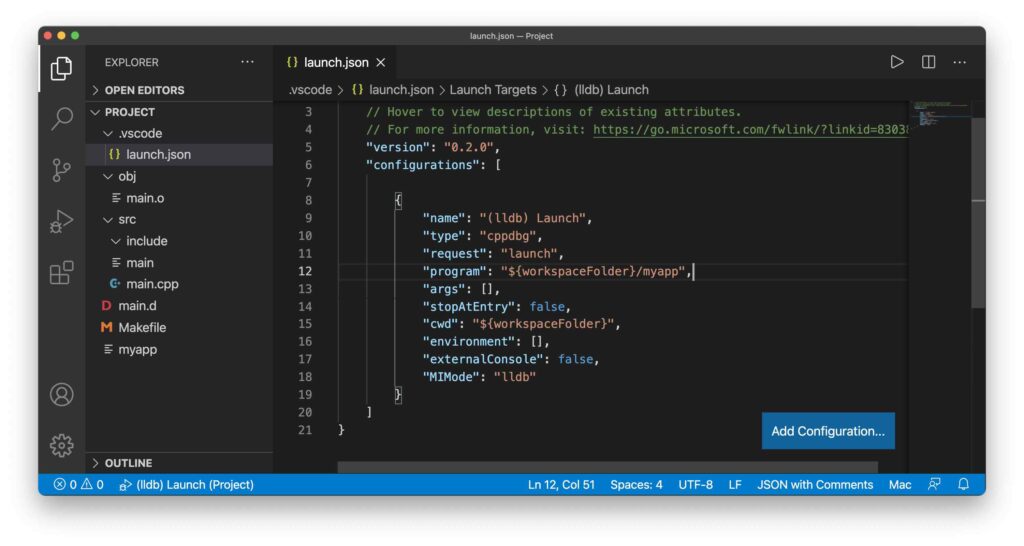
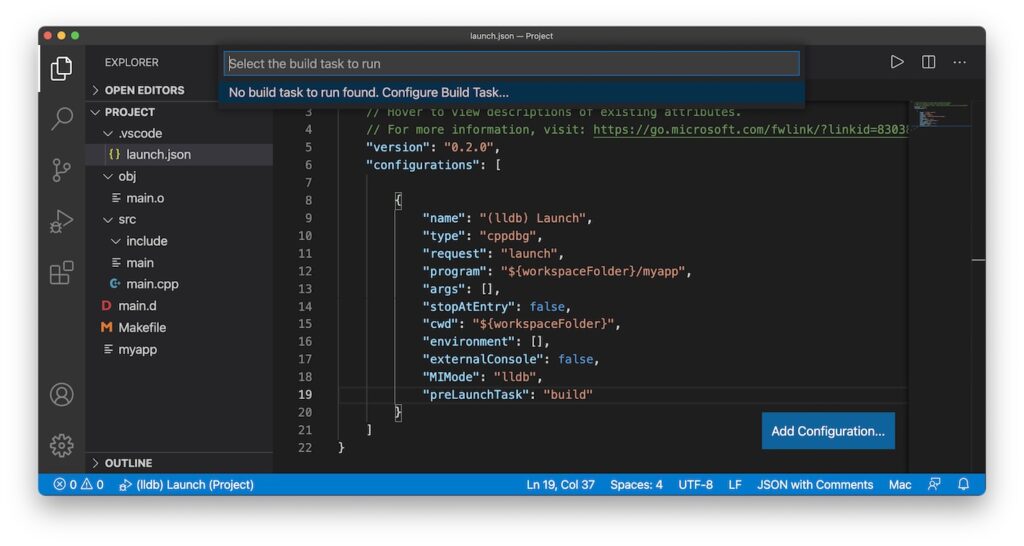
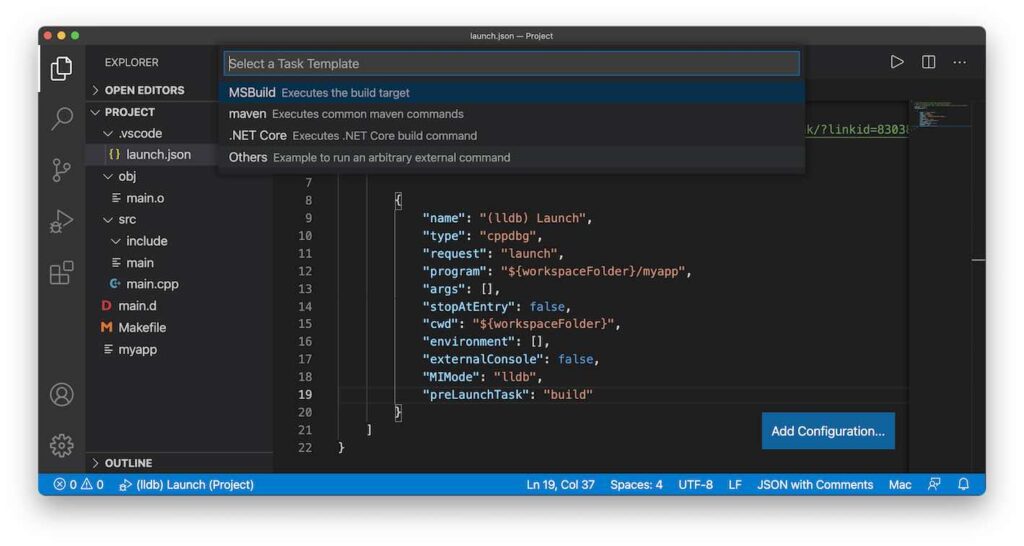
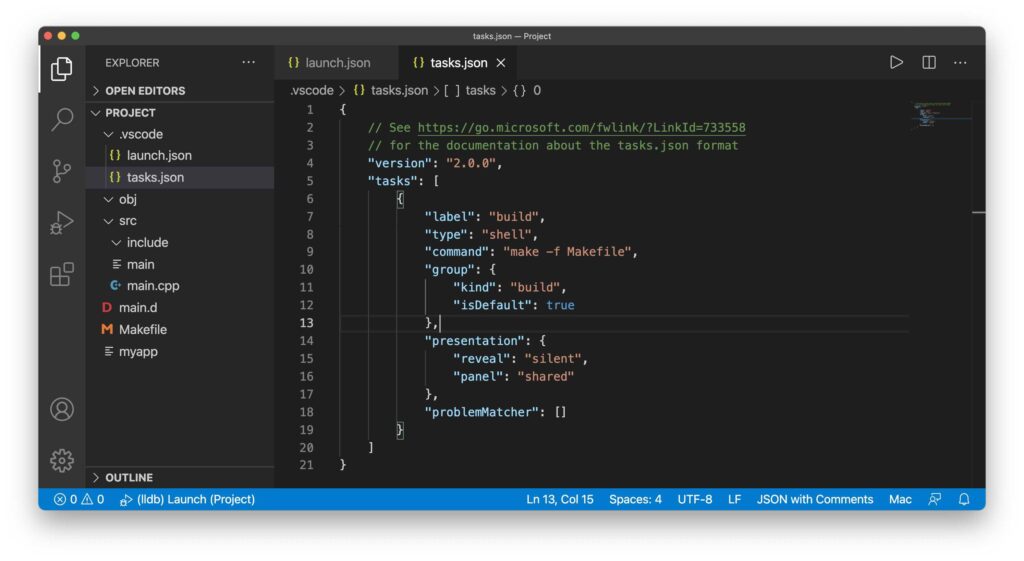
Rushil covers how to set up debugging on VSCode with WSL, along with some common errors. Duration: 8 minutes.

Leave a Reply

Your email address will not be published. Required fields are marked *

Scroll to Top